
සාංචිය
| සාංචිය | |
|---|---|
 සාංචියේ මහා ස්තූපය, නැගෙනහිර තොරණ. | |
 සාංචි  සාංචි සාංචි | |
| සාමාන්ය තොරතුරු | |
| ප්රභේදය | ස්තූපය සහ අවට ගොඩනැගිලි |
| ගෘහනිර්මාණ ශෛලිය | බෞද්ධ |
| පිහිටීම | සාංචි නගරය, මධ්ය ප්රදේශ්, ඉන්දියාව, ආසියාව |
| ඉදිකිරීම් ආරම්භ වූයේ | ක්රි.පූ. 3වන සියවස |
| උස | 16.46 m (54.0 ft) (මහා ස්තූපයේ ගර්භය) |
| මිනුම් | |
| විෂ්කම්භය | 36.6 m (120 ft) (මහා ස්තූපයේ ගර්භය) |
| නිල නාමය | සාංචියේ බෞද්ධ ස්මාරක |
| නිර්ණායකය | Cultural: i, ii, iii, iv, vi |
| මූලාශ්ර | 524 |
| අභිලේඛනය | 1989 (13 වන සැසිය) |
ඛණ්ඩාංක: 23°28′45″N 77°44′23″E / 23.479223°N 77.739683°E

සාංචි ස්තූපය ඉන්දියාවේ මධ්ය ප්රදේශ් ප්රාන්තයේ රායිසේන් දිස්ත්රික්කයේ සාංචි නගරයේ පිහිටා ඇත. එය මධ්ය ප්රදේශ් හි අගනුවර වන භෝපාල් සිට කිලෝමීටර 46ක් (සැතපුම් 29) ඊසානදිගට වන්නට පිහිටා තිබේ.
| දඹදිව |
| බෞද්ධ වන්දනා ස්ථාන |
|---|
 |
| ධර්ම සංවේගය උපදවාගත යුතු ස්ථාන |
| අමතර ස්ථාන සතරක් |
| වෙනත් ස්ථාන |
| පසුකාලීන ස්ථාන |
සාංචියේ මහා ස්තූපය ඉන්දියාවේ පැරණිතම පාෂාණමය ඉදිකිරීමක් වන අතර, එය ඉන්දියානු ගෘහනිර්මාණ ශිල්පයේ වැදගත් ස්මාරකයක් වේ.[1] මෙහි මුල් නිර්මාණය ක්රි.පූ. 3වන සියවසේ අශෝක අධිරාජයාගේ මූලිකත්වයෙන් සිදු විය. එහි ගර්භය සරල අර්ධ ගෝලාකාර ගඩොළු ව්යූහයක් වූ අතර, එහි බුදුන් වහන්සේගේ ධාතූන් තැන්පත් කොට තිබිණි. It was crowned by the chhatri, a parasol-like structure symbolising high rank, which was intended to honour and shelter the relics. The original construction work of this stupa was overseen by Ashoka, whose wife Devi was the daughter of a merchant of nearby Vidisha. Sanchi was also her birthplace as well as the venue of her and Ashoka's wedding. In the 1st century BCE, four elaborately carved toranas (ornamental gateways) and a balustrade encircling the entire structure were added. The Sanchi Stupa built during Mauryan period was made of bricks. The composite flourished until the 11th century.
Sanchi is the center of a region with a number of stupas, all within a few miles of Sanchi, including Satdhara (9 km to the W of Sanchi, 40 stupas, the Relics of Sariputra and Mahamoggallana, now enshrined in the new Vihara, were unearthed there), Bhojpur (also called Morel Khurd, a fortified hilltop with 60 stupas) and Andher (respectively 11 km and 17 km SE of Sanchi), as well as Sonari (10 km SW of Sanchi).[2][3] Further south, about 100 km away, is Saru Maru. Bharhut is 300 km to the northeast.
Sanchi Stupa is depicted on the reverse side of the Indian currency note of Rs 200 to signify its importance to Indian cultural heritage.[4]
හැඳින්වීම
[සංස්කරණය]
වර්තමානයේ සාංචියේ දක්නට ලැබෙන ස්මාරක මෞර්ය අධිරාජ්ය යුගයේ (ක්රි.පූ. 3වන සියවස) සිට අඛණ්ඩව ගුප්ත අධිරාජ්ය යුගය (ක්රි.ව. 5වන සියවස) දක්වාත්, සහ අවසානයේ ක්රි.ව. 12වන සියවස අවට දී නිර්මාණය වූ බෞද්ධ ස්මාරක සමූහයකි.[5] මෙය බොහෝවිට ඉන්දියාවේ වඩාත්ම හොඳින් සංරක්ෂණය වී ඇති බෞද්ධ ස්මාරක සමූහය විය හැක.[5] මෙහි ඇති පැරණිතම සහ විශාලතම ස්මාරකය වන මහා ස්තූපය හෙවත් ස්තූප අංක 1 මුලින්ම මෞර්ය යුගයේ ඉදිවූ අතර, එය අසල අශෝක ස්තම්භයක් ද පිහිටුවා තිබිණි.[5] පසුකාලීන සියවස්වල දී, විශේෂයෙන්ම ශුංග සහ සාතවාහනයන්ගේ කාලසීමාවේ දී මහා ස්තූපය විශාල කොට තනවා අලංකාර තොරණ සහ වේදිකා ද එක් කරන ලදී. එසේම මෙය ආසන්නයේ කුඩා ස්තූප, විශේෂයෙන් ස්තූප අං.2, සහ ස්තූප අං.3. ඉදිකරන ලදී[5]
ඉන් අනතුරුව, ගුප්ත අධිරාජ්ය යුගය තෙක්ම එයට විවිධ අංග එක් කෙරිණි. මේ අනුව, සමස්තයක් වශයෙන් ගත්කළ සාංචිය පුරාතන ඉන්දියානු ගෘහනිර්මාණ ශිල්පයේ සහ ඉන්දියානු බෞද්ධ ගෘහනිර්මාණ ශිල්පයේ විකාසනය පෙන්වන කැඩපතක් බඳු ය. මෙමඟින් මුල්කාලීන බුද්ධාගම, එහි ආදිතම කලා සම්ප්රදායයන් සහ ඉන්දීය උපමහාද්වීපයේ බුද්ධාගමේ පරිහානිය තෙක් කාලසීමාව නිරූපණය කරයි.[5]
-
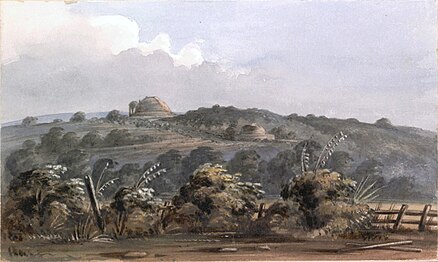 සාංචි ස්තූපවල සාමන්ය දර්ශනය එෆ්.සී. මේසී, 1851 (මහා ස්තූපය කඳු මුදුනේ ද, ස්තූප අංක 2 ඉදිරියෙන් ද වේ)
 -
 ක්රි.පූ. 3වන සියවසේ ආරම්භ වූ මහා ස්තූපය (ස්තූප අං.1),
 -
 ස්තූප අං.2
 -
 ස්තූප අං.3
 -
 බෞද්ධ විහාරය, අං.17


.jpg)

මෞර්ය යුගය (ක්රි.පූ. 3වන සියවස)
[සංස්කරණය]
සාංචියේ "මහා ස්තූපය" මෙහි ඇති පැරණිතම ව්යූහය වන අතර, එය මුලින් නිර්මාණය කරන ලද්දේ ක්රි.පූ. 3වන සියවසේ මෞර්ය අධිරාජ අශෝක විසිනි.[6] මෙහි මධ්යය බුදුන් වහන්සේගේ ධාතු නිධන් කොට තැනූ අර්ධ ගෝලාකාර ගඩොල් නිමැවුමකින් සමන්විත විය.[6] එහි පාදම වටා උස්වූ පේසාවක් පිහිටි අතර, ගර්භය මත ගරාදි වැටක් සහ උසස් බව හැඟවීම උදෙසා ඡත්රයක් ද සවිකොට තිබිණ.[7][8] මෙහි මුල් ස්තූපය වර්තමාන ස්තූපයේ විෂ්කම්භයෙන් අඩක් පමණ වූ අතර, ශුංගයන් විසින් එය විශාල කොට ඇත. වර්තමානයේ පාෂාණයෙන් ආවරණය කිට තිබුණ ද, අතීතයේ එය ගඩොල්වලින් ආවරණය කොට තිබිණි.[7]
According to one version of the Mahavamsa, the Buddhist chronicle of Sri Lanka, Ashoka was closely connected to the region of Sanchi. When he was heir-apparent and was journeying as Viceroy to Ujjain, he is said to have halted at Vidisha (10 kilometers from Sanchi), and there married the daughter of a local banker. She was called Devi and later gave Ashoka two sons, Ujjeniya and Mahendra, and a daughter Sanghamitta. After Ashoka's accession, Mahendra headed a Buddhist mission, sent probably under the auspices of the Emperor, to Sri Lanka, and that before setting out to the island he visited his mother at Chetiyagiri near Vidisa, thought to be Sanchi. He was lodged there in a sumptuous vihara or monastery, which she herself is said to have had erected.[9]
අශෝක ස්තම්භය
[සංස්කරණය].jpg)
A pillar of finely polished sandstone, one of the Pillars of Ashoka, was also erected on the side of the main Torana gateway. The bottom part of the pillar still stands. The upper parts of the pillar are at the nearby Sanchi Archaeological Museum. The capital consists in four lions, which probably supported a Wheel of Law,[12] as also suggested by later illustrations among the Sanchi reliefs. The pillar has an Ashokan inscription (Schism Edict)[13] and an inscription in the ornamental Sankha Lipi from the Gupta period.[6] The Ashokan inscription is engraved in early Brahmi characters. It is unfortunately much damaged, but the commands it contains appear to be the same as those recorded in the Sarnath and Kausambi edicts, which together form the three known instances of Ashoka's "Schism Edict". It relates to the penalties for schism in the Buddhist sangha:
... the path is prescribed both for the monks and for the nuns. As long as (my) sons and great-grandsons (shall reign; and) as long as the Moon and the Sun (shall endure), the monk or nun who shall cause divisions in the Sangha, shall be compelled to put on white robes and to reside apart. For what is my desire? That the Sangha may be united and may long endure.
The pillar, when intact, was about 42 feet in height and consisted of round and slightly tapering monolithic shaft, with bell-shaped capital surmounted by an abacus and a crowning ornament of four lions, set back to back, the whole finely finished and polished to a remarkable luster from top to bottom. The abacus is adorned with four flame palmette designs separated one from the other by pairs of geese, symbolical perhaps of the flock of the Buddha's disciples. The lions from the summit, though now quite disfigured, still testify to the skills of the sculptors.[15]
The sandstone out of which the pillar is carved came from the quarries of Chunar several hundred miles away, implying that the builders were able to transport a block of stone over forty feet in length and weighing almost as many tons over such a distance. They probably used water transport, using rafts during the rainy season up until the Ganges, Jumna and Betwa rivers.[15]
Temple 40
[සංස්කරණය]

Another structure which has been dated, at least partially, to the 3rd century BCE, is the so-called Temple 40, one of the first instances of free-standing temples in India.[16] Temple 40 has remains of three different periods, the earliest period dating to the Maurya age, which probably makes it contemporary to the creation of the Great Stupa. An inscription even suggests it might have been established by Bindusara, the father of Ashoka.[17] The original 3rd century BCE temple was built on a high rectangular stone platform, 26.52×14×3.35 metres, with two flights of stairs to the east and the west. It was an apsidal hall, probably made of timber. It was burnt down sometime in the 2nd century BCE.[18][19]
Later, the platform was enlarged to 41.76×27.74 metres and re-used to erect a pillared hall with fifty columns (5×10) of which stumps remain. Some of these pillars have inscriptions of the 2nd century BCE. In the 7th or 8th century a small shrine was established in one corner of the platform, re-using some of the pillars and putting them in their present position.[20][19]
 Approximate reconstitution of the Great Stupa with its pillar of Ashoka, under the Mauryas circa 260 BCE. |
|


ශුංග යුගය (ක්රි.පූ. 2වන සියවස)
[සංස්කරණය]On the basis of Ashokavadana, it is presumed that the stupa may have been vandalized at one point sometime in the 2nd century BCE, an event some have related to the rise of the Shunga emperor Pushyamitra Shunga who overtook the Mauryan Empire as an army general. It has been suggested that Pushyamitra may have destroyed the original stupa, and his son Agnimitra rebuilt it.[21] The original brick stupa was covered with stone during the Shunga period.
Given the rather decentralized and fragmentary nature of the Shunga state, with many cities actually issuing their own coinage, as well as the relative dislike of the Shungas for Buddhism, some authors argue that the constructions of that period in Sanchi cannot really be called "Shunga". They were not the result of royal sponsorship, in contrast with what happened during the Mauryas, and most of the dedications at Sanchi were private or collective, rather than the result of royal patronage.[22]
The style of the Shunga period decorations at Sanchi bear a close similarity to those of Bharhut, as well as the peripheral balustrades at the Mahabodhi Temple in Bodh Gaya.

Great Stupa (No 1)
[සංස්කරණය]During the later rule of the Shunga, the stupa was expanded with stone slabs to almost twice its original size. The dome was flattened near the top and crowned by three superimposed parasols within a square railing. With its many tiers it was a symbol of the dharma, the Wheel of the Law. The dome was set on a high circular drum meant for circumambulation, which could be accessed via a double staircase. A second stone pathway at ground level was enclosed by a stone balustrade. The railings around Stupa 1 do not have artistic reliefs. These are only slabs, with some dedicatory inscriptions. These elements are dated to circa 150 BCE,[23] or 175–125 BCE.[24] Although the railings are made up of stone, they are copied from a wooden prototype, and as John Marshall has observed the joints between the coping stones have been cut at a slant, as wood is naturally cut, and not vertically as stone should be cut. Besides the short records of the donors written on the railings in Brahmi script, there are two later inscriptions on the railings added during the time of the Gupta Period.[25] Some reliefs are visible on the stairway balustrade, but they are probably slightly later than those at Stupa No2,[26] and are dated to 125–100 BCE.[24] Some authors consider that these reliefs, rather crude and without obvious Buddhist connotations, are the oldest reliefs of all Sanchi, slightly older even than the reliefs of Sanchi Stupa No.2.[24]
| Great Stupa (No1). Shunga period structures and decorations (2nd century BCE) | |
 Great Stupa (Stupa expansion and balustrades only are Shunga). Undecorated ground railings dated to approximately 150 BCE.[23] Some reliefs on the stairway balustrade. |
Stairway balustrade reliefs
|


.jpg)


Stupa No. 2: the first Buddhist reliefs
[සංස්කරණය]
The stupas which seem to have been commissioned during the rule of the Shungas are the Second and then the Third stupas (but not the highly decorated gateways, which are from the following Satavahana period, as known from inscriptions), following the ground balustrade and stone casing of the Great Stupa (Stupa No 1). The reliefs are dated to circa 115 BCE for the medallions, and 80 BCE for the pillar carvings,[28] slightly before the reliefs of Bharhut for the earliest, with some reworks down to the 1st century CE.[23][28]

Stupa No. 2 was established later than the Great Stupa, but it is probably displaying the earliest architectural ornaments.[26] For the first time, clearly Buddhist themes are represented, particularly the four events in the life of the Buddha that are: the Nativity, the Enlightenment, the First Sermon and the Decease.[31]
The decorations of Stupa No. 2 have been called "the oldest extensive stupa decoration in existence",[29] and this Stupa is considered as the birthplace of Jataka illustrations.[30] The reliefs at Stupa No.2 bear mason marks in Kharoshthi, as opposed to the local Brahmi script.[27] This seems to imply that foreign workers from the north-west (from the region of Gandhara, where Kharoshthi was the current script) were responsible for the motifs and figures that can be found on the railings of the stupa.[27] Foreigners from Gandhara are otherwise known to have visited the region around the same time: in 115 BCE, the embassy of Heliodorus from Indo-Greek king Antialkidas to the court of the Sungas king Bhagabhadra in nearby Vidisha is recorded, in which Heliodorus established the Heliodorus pillar in a dedication to Vāsudeva. This would indicate that relations had improved at that time, and that people traveled between the two realms.[32]
 Stupa No. 2 Shunga period, but mason's marks in Kharoshti point to craftsmen from the north-west (region of Gandhara) for the earliest reliefs (circa 115 BCE).[27][28][23] |
|
![Lakshmi with lotus and two child attendants, probably derived from similar images of Venus[33]](/wiki/%E0%B6%9C%E0%B7%9C%E0%B6%B1%E0%B7%94%E0%B7%80:Lakshmi_Sanchi_Stupa_2.jpg)


Stupa No. 3
[සංස්කරණය]Stupa No. 3 was built during the time of the Shungas, who also built the railing around it as well as the staircase. The Relics of Sariputra and Mahamoggallana, the disciples of the Buddha are said to have been placed in Stupa No. 3, and relics boxes were excavated tending to confirm this.[34]
The reliefs on the railings are said to be slightly later than those of Stupa No. 2.[24]
The single torana gateway oriented to the south is not Shunga, and was built later under the Satavahanas, probably circa 50 BCE.[24]
 Stupa No. 3 (Stupa and balustrades only are Shunga). |
|
.jpg)
.jpg)
.jpg)

Sunga Pillar
[සංස්කරණය]
Pillar 25 at Sanchi is also attributed to the Sungas, in the 2nd–1st century BCE, and is considered as similar in design to the Heliodorus pillar, locally called Kham Baba pillar, dedicated by Heliodorus, the ambassador to the Indo-Greek king Antialkidas, in nearby Vidisha circa 100 BCE.[36] That it belongs to about the period of the Sunga, is clear alike from its design and from the character of the surface dressing.
The height of the pillar, including the capital, is 15 ft, its diameter at the base 1 ft. 4 in. Up to a height of 4 ft. 6 in. the shaft is octagonal; above that, sixteen-sided. In the octagonal portion all the facets are flat, but in the upper section the alternate facets are fluted, the eight other sides being produced by a concave chamfering of the arrises of the octagon. This method of finishing off the arris at the point of transition between the two sections are features characteristic of the second and first centuries BCE. The west side of the shaft is split off, but the tenon at the top, to which the capital was mortised, is still preserved. The capital is of the usual bell-shaped Persepolitan type, with lotus leaves falling over the shoulder of the bell. Above this is a circular cable necking, then a second circular necking relieved by a bead and lozenge pattern, and, finally, a deep square abacus adorned with a railing in relief. The crowning feature, probably a lion, has disappeared.[36]
සාතවාහන යුගය (ක්රි.පූ. 1වන සියවස – ක්රි.ව. 1වන සියවස)
[සංස්කරණය]Dated circa 50 BCE- 0 CE.
The Satavahana Empire under Satakarni II conquered eastern Malwa from the Shungas.[39] This gave the Satavahanas access to the Buddhist site of Sanchi, in which they are credited with the building of the decorated gateways around the original Mauryan Empire and Sunga stupas.[40] From the 1st century BCE, the highly decorated gateways were built. The balustrade and the gateways were also colored.[6] Later gateways/toranas are generally dated to the 1st century CE.[26]
The Siri-Satakani inscription in the Brahmi script records the gift of one of the top architraves of the Southern Gateway by the artisans of the Satavahana king Satakarni II:[37]
𑀭𑀸𑀜𑁄 𑀲𑀺𑀭𑀺 𑀲𑀸𑀢𑀓𑀡𑀺𑀲 (රාණෝ සිරි සාතකණිස)
𑀆𑀯𑁂𑀲𑀡𑀺𑀲 𑀯𑀸𑀲𑀺𑀣𑀻𑀧𑀼𑀢𑀲 (ආවේසණිස වාසිඨීපුතස)
𑀆𑀦𑀁𑀤𑀲 𑀤𑀸𑀦𑀁 (ආනන්දස දානං)"රාජ සිරි සාතකර්ණීගේ, ප්රධාන කලාශිල්පී, වාසිඨිගේ පුත් ආනන්දගේ දානයයි"
There are some uncertainties about the date and the identity of the Satakarni in question, as a king Satakarni is mentioned in the Hathigumpha inscription which is sometimes dated to the 2nd century BCE. Also, several Satavahana kings used the name "Satakarni", which complicates the matter. Usual dates given for the gateways range from 50 BCE to the 1st century CE, and the builder of the earliest gateways is generally considered to be Satakarni II, who ruled in 50-25 BCE.[39][26] Another early Satavahana monument is known, Cave No.19 of king Kanha (100-70 BCE) at the Nasik Caves, which is much less developed artistically than the Sanchi toranas.
මාධ්ය සහ කැටයම් ශිල්ප ක්රම
[සංස්කරණය]

Although made of stone, the torana gateways were carved and constructed in the manner of wood and the gateways were covered with narrative sculptures. It has also been suggested that the stone reliefs were made by ivory carvers from nearby Vidisha, and an inscription on the Southern Gateway of the Great Stupa ("The Worship of the Bodhisattva's hair") was dedicated by the Guild of Ivory Carvers of Vidisha.[41][42]

The inscription reads: "Vedisakehi damtakārehi rupakammam katam" meaning "The ivory-workers from Vidisha have done the carving".[44][45] Some of the Begram ivories or the "Pompeii Lakshmi" give an indication of the kind of ivory works that could have influenced the carvings at Sanchi.
The reliefs show scenes from the life of the Buddha integrated with everyday events that would be familiar to the onlookers and so make it easier for them to understand the Buddhist creed as relevant to their lives. At Sanchi and most other stupas the local population donated money for the embellishment of the stupa to attain spiritual merit. There was no direct royal patronage. Devotees, both men and women, who donated money towards a sculpture would often choose their favourite scene from the life of the Buddha and then have their names inscribed on it. This accounts for the random repetition of particular episodes on the stupa (Dehejia 1992).
On these stone carvings the Buddha was never depicted as a human figure, due to aniconism in Buddhism. Instead the artists chose to represent him by certain attributes, such as the horse on which he left his father's home, his footprints, or a canopy under the bodhi tree at the point of his enlightenment. The human body was thought to be too confining for the Buddha.
Architecture: evolution of the load-bearing pillar capital
[සංස්කරණය]


Similarities have been found in the designs of the capitals of various areas of northern India from the time of Ashoka to the time of the Satavahanas at Sanchi: particularly between the Pataliputra capital at the Mauryan Empire capital of Pataliputra (3rd century BCE), the pillar capitals at the Sunga Empire Buddhist complex of Bharhut (2nd century BCE), and the pillar capitals of the Satavahanas at Sanchi (1st centuries BCE/CE).[46]
The earliest known example in India, the Pataliputra capital (3rd century BCE) is decorated with rows of repeating rosettes, ovolos and bead and reel mouldings, wave-like scrolls and side volutes with central rosettes, around a prominent central flame palmette, which is the main motif. These are quite similar to Classical Greek designs, and the capital has been described as quasi-Ionic.[47][48] Greek influence,[49] as well as Persian Achaemenid influence have been suggested.[50]
The Sarnath capital is a pillar capital discovered in the archaeological excavations at the ancient Buddhist site of Sarnath.[51] The pillar displays Ionic volutes and palmettes.[52][53] It has been variously dated from the 3rd century BCE during the Mauryan Empire period,[54][51] to the 1st century BCE, during the Sunga Empire period.[52] One of the faces shows a galopping horse carrying a rider, while the other face shows an elephant and its mahaut.[52]
The pillar capital in Bharhut, dated to the 2nd century BCE during the Sunga Empire period, also incorporates many of these characteristics,[55][56] with a central anta capital with many rosettes, beads-and-reels, as well as a central palmette design.[46][57][58] Importantly, recumbent animals (lions, symbols of Buddhism) were added, in the style of the Pillars of Ashoka.
The Sanchi pillar capital is keeping the general design, seen at Bharhut a century earlier, of recumbent lions grouped around a central square-section post, with the central design of a flame palmette, which started with the Pataliputra capital. However the design of the central post is now simpler, with the flame palmette taking all the available room.[59] Elephants were later used to adorn the pillar capitals (still with the central palmette design), and lastly, Yakshas (here the palmette design disappears).
Main themes of the reliefs
[සංස්කරණය]
ජාතක කථා
[සංස්කරණය]විවිධ ජාතක කථා නිරූපණය කොට ඇත. මෙමඟින් බුදුන් වහන්සේ බෝධිසත්ත්වයකුව සිට පෙර ආත්ම භවයන් නිරූපණය වේ. මෙහි හමුවන ජාතක කථා අතර සාම සාතකය, වෙස්සන්තර ජාතකය සහ මහාකපි ජාතකය කිහිපයකි.
Miracles
[සංස්කරණය]Numerous miracles made by the Buddha are recorded. Among them:
Temptation of the Buddha
[සංස්කරණය]Numerous scene refer to the temptation of the Buddha, when he was confronted with the seductive daughters of Mara and with his army of demons. Having resisted the temptations of Mara, the Buddha finds enlightenment. Other similar scenes on the same subject:
- Temptation of the Buddha with Mara's army fleeing.
- Enlightenment of the Buddha with Mara's army fleeing.[61]

War over the Buddha's Relics
[සංස්කරණය]The southern gate of Stupa No1, thought to be oldest and main entrance to the stupa,[63] has several depictions of the story of the Buddha's relics, starting with the War over the Relics.
After the death of the Buddha, the Mallas of Kushinagar wanted to keep his ashes, but the other kingdoms also wanting their part went to war and besieged the city of Kushinagar. Finally, an agreement was reached, and the Buddha's cremation relics were divided among 8 royal families and his disciples.[64][65] This famous view shows warfare techniques at the time of the Satavahanas, as well as a view of the city of Kushinagar of the Mallas, which has been relied on for the understanding of ancient Indian cities.
Other narrative panels related to the War over the Buddha's Relics at Sanchi are:
- "The King of the Mallas bringing the relics of the Buddha to Kushinagara", right after the death of the Buddha, before the War itself. In this relief, the king is seen seated on an elephant, holding the relics on his head.[66]
- "The siege of Kushinagara by the seven kings", another relief on the same subject.

Removal of the relics by Ashoka
[සංස්කරණය]According to Buddhist legend, a few centuries later, the relics would be removed from the eight guardian kingdoms by King Ashoka, and enshrined into 84,000 stupas.[64][65][68] Ashoka obtained the ashes from seven of the guardian kingdoms, but failed to take the ashes from the Nagas at Ramagrama who were too powerful, and were able to keep them. This scene is depicted in one of the transversal portions of the southern gateway of Stupa No1 at Sanchi. Ashoka is shown on the right in his charriot and his army, the stupa with the relics is in the center, and the Naga kings with their serpent hoods at the extreme left under the trees.[69]
.jpg)
Building of the Bodh Gaya temple by Ashoka
[සංස්කරණය]

Ashoka went to Bodh Gaya to visit the Bodhi Tree under which the Buddha had his enlightenment, as described his Major Rock Edict No.8. However Ashoka was profoundly grieved when he discovered that the sacred pipal tree was not properly being taken care of and dying out due to the neglect of Queen Tiṣyarakṣitā.[73]
As a consequence, Ashoka endeavoured to take care of the Bodhi Tree, and built a temple around it. This temple became the center of Bodh Gaya. A sculpture at Sanchi, southern gateway of Stupa No1, shows Ashoka in grief being supported by his two Queens. Then the relief above shows the Bodhi Tree prospering inside its new temple. Numerous other sculptures at Sanchi show scenes of devotion towards the Bodhi Tree, and the Bodhi Tree inside its temple at Bodh Gaya.[73]
Other versions of the relief depicting the temple for the Bodhi Tree are visible at Sanchi, such as the Temple for the Bodhi Tree (Eastern Gateway).
Foreign devotees
[සංස්කරණය]
Some of the friezes of Sanchi also show devotees in Greek attire, wearing kilted tunics and some of them a Greek piloi hat.[75][76][74] They are also sometimes described as Sakas, although the historical period seems too early for their presence in Central India, and the two pointed hats seem too short to be Scythian.[74] The official notice at Sanchi describes "Foreigners worshiping Stupa".[77] The men are depicted with short curly hair, often held together with a headband of the type commonly seen on Greek coins. The clothing too is Greek, complete with tunics, capes and sandals, typical of the Greek travelling costume.[78] The musical instruments are also quite characteristic, such as the "thoroughly Greek" double flute called aulos.[74][79] Also visible are carnyx-like horns.[79]
The actual participation of Yavanas/Yonas (Greek donors)[80] to the construction of Sanchi is known from three inscriptions made by self-declared Yavana donors:
- The clearest of these reads "Setapathiyasa Yonasa danam" ("Gift of the Yona of Setapatha"),[81][82] Setapatha being an uncertain city, possibly a location near Nasik,[83] a place where other dedications by Yavanas are known, in cave No.17 of the Nasik Caves complex, and on the pillars of the Karla Caves not far away.
- A second similar inscription on a pillar reads: "[Sv]etapathasa (Yona?)sa danam", with probably the same meaning, ("Gift of the Yona of Setapatha").[83][84]
- The third inscription, on two adjacent pavement slabs reads "Cuda yo[vana]kasa bo silayo" ("Two slabs of Cuda, the Yonaka").[85][83]
Around 113 BCE, Heliodorus, an ambassador of the Indo-Greek ruler Antialcidas, is known to have dedicated a pillar, the Heliodorus pillar, around 5 miles from Sanchi, in the village of Vidisha.
Another rather similar foreigner is also depicted in Bharhut, the Bharhut Yavana (circa 100 BCE), also wearing a tunic and a royal headband in the manner of a Greek king, and displaying a Buddhist triratna on his sword.[86][87] Another one can be seen in the region of Odisha, in the Udayagiri and Khandagiri Caves.
| Northwestern foreigners at Sanchi |
![Foreigners holding grapes and riding winged lions, Sanchi Stupa 1, Eastern Gateway.[88]](/wiki/%E0%B6%9C%E0%B7%9C%E0%B6%B1%E0%B7%94%E0%B7%80:Foreigners_riding_winged_lions_Sanchi_Stupa_1_Eastern_Gateway.jpg)


Aniconism
[සංස්කරණය]
In all these scenes, the Buddha is never represented, being absent altogether even from scenes of his life where he is playing a central role: in the Miracle of the Buddha walking on the river Nairanjana he is just represented by his path on the water;[90] in the Procession of king Suddhodana from Kapilavastu, he walks in the air at the end of the procession, but his presence is only suggested by people turning their heads upward toward the symbol of his path.[90]

In one of the reliefs of the Miracle at Kapilavastu, King Suddhodana is seen praying as his son the Buddha rises in the air. The Buddha praised is praised by celestial beings, but only his path is visible in the form of a slab hanging in middle air, called a chankrama or "promenade".[89]
Otherwise, the presence of the Buddha is symbolized by an empty throne, as in the scene of Bimbisara with his royal cortege issuing from the city of Rajagriha to visit the Buddha.[91] Similar scenes would later appear in the Greco-Buddhist art of Gandhara, but this time with representations of the Buddha. John Marshall detailed every panel in his seminal work "A Guide to Sanchi".[92]
This anoconism is relation to the image of the Buddha could be in conformity with an ancient Buddhist prohibition against showing the Buddha himself in human form, known from the Sarvastivada vinaya (rules of the early Buddhist school of the Sarvastivada): ""Since it is not permitted to make an image of the Buddha's body, I pray that the Buddha will grant that I can make an image of the attendant Bodhisattva. Is that acceptable?" The Buddha answered: "You may make an image of the Bodhisattava"".[93]
The Gateways or Toranas
[සංස්කරණය]The gateways depict various scenes of the life of the Buddha, as well as events after his death, in particular the War of the Relics and the efforts of emperor Ashoka to spread the Buddhist faith.
Stupa 1 Southern Gateway
[සංස්කරණය]The Southern Gateway of Stupa No1 is thought to be oldest and main entrance to the stupa.[94] The narrative friezes of this gateway put great emphasis on the relics of the Buddha, and on the role of Ashoka in spreading the Buddhist faith. This gateway is one of the two which were reconstructed by Major Cole in 1882–83. The whole of the right jamb and half of the left are new and blank, as well as the west end of the lowest architrave, the east end of the middle architrave, and the six vertical uprights between the architraves.[95]
| Southern Gateway ("Great Stupa" No1, Sanchi. 1st century BCE.) | ||
.JPG)
|
The Southern Gateway of Stupa 1. The Southern Gateway of Stupa 1 is one of the four richly carved gateways or toranas, surrounding Stupa 1, the "Great Stupa". It is the main one as it was erected in front of the steps by which the terrace was ascended. The Southern Gateway was also the first to be erected. Then followed, in chronological order, the Northern, the Eastern and the Western, their succession in each case being demonstrated by the style of their carvings. It is probable, however, that not more than three or four decades intervened between the building of the Southern and Western gateways.
A few of the surfaces of the Southern Gateway are undecorated or lost. Like the other gateways, the Southern Gateway is composed of two square pillars surmounted by capitals, which in their turn support a superstructure of three architraves with volute ends.[96] | |
| Architraves | ||

Front architraves |

Rear architraves |
Some material was lost over two thousand years, and the restoration had to make up for lost elements with some blank slabs. The whole of the right jamb and half of the left are new, as well as the west end of the lowest architrave, the east end of the middle architrave, and the six vertical uprights between the architraves. When the gateway was restored, the top and the lowest lintels appear to have been reversed by mistake, since the more important sculptures on them now face the stupa instead of facing outwards.[95] |
|
Front middle architrave |
King Ashoka visits Ramagrama. King Ashoka visited Ramagrama, to take relics of the Buddha from the Nagas, but he failed, the Nagas being too powerful. After the death of the Buddha, his relics were originally divided into eight portions, and shared between eight princes. Each of the princes constructed a stupa at or near his capital city, within which the respective portion of the ashes was enshrined.[97] These eight stupas were erected at Rajagriha, Vaisali, Kapilavastu, Allakappa, Ramagrama, Vothadvipa, Pava and Kusinara.[98] | |
.jpg)
Rear top architrave |
The seven Buddhas.
Six Buddhas of the past and Gautama Buddha, with his Bodhi Tree at the extreme right.In the central section are three stupas alternating with four trees with thrones in front of them, adored by figures both human and divine. These represent the six Buddhas of the past (namely : Vipassi, Sikhi, Vessabhu, Kakusandha, Konagamana and Kaasapa) and Gautama Buddha. Three are symbolized by their stupas, and four by the trees under which each respectively attained enlightenment. The tree on the extreme right is the pipal tree of Gautama Buddha and the one next to it is the banyan tree of Kasyapa Buddha. The identification of the others is less certain.  The inscription on the dome of the central stupa reads "L. 1. rano Siri Satakanisa/ L. 2. avesanisa vasithiputasa/ L. 3. Anamdasa danam" ("Gift of Anamda, the son of Vdsithi (Vdsishthi ), the foreman of the artisans (avesanin) of rajan Siri-Satakani).[95] This inscription has been decisive in attributing the construction of the gateways to the time of the Satavahana Empire. | |

Rear bottom architrave |
War over the Buddha's Relics.
 The Buddha died in Kushinagara, the capital of the Mallas, who initially tried to keep all the relics of the Buddha for themselves. A war erupted in which the chiefs of seven other clans waged war against the Mallas of Kushinara for the possession of the Buddha's relics. In the centre of the architrave, the siege of Kushinara is in progress; to right and left, the victorious chiefs are departing in chariots and on elephants, with the relics borne on the heads of the latter.[95] | |
| Pillar capitals | ||
.jpg)
Left |

Right |
The pillars of the Southern Gateway feature lions in the manner of the Pillars of Ashoka. They are the only pillar capitals of the Sanchi complex to do so. |
| Pillars | ||
| External faces | ||

|

|
The left external face consists in a foliage scroll inhabited by numerous animals and garlands, as well as an amorous couple repeated several time. Of the right pillar external face, nothing remains, and it has been left blank by the reconstitution under Marshall. |
| Left pillar, Front face | ||
| Top panel | 
|
Ashoka with his two Queens visiting the Deer Park. A Persepolitan column, rising from a stepped base and supporting a wheel with thirty-two spokes and an equal number of triratna devices on its outer rim. This is the dharmachakra or "Wheel of the Law", the emblem of the Buddha's first sermon. On either side of the wheel are celestial figures with garlands; below them are four groups of worshipers, and below the latter, deers, to indicate the spot where the first sermon was preached, namely, in the Deer Park (Mrigadava) near Benares. In each of the groups of worshipers is a king with attendant females, the same figures apparently being repeated four times. They probably represent Asoka with his two queens visiting the Deer Park during his pilgrimage to the holy places of Buddhism.[98] |
| 2nd panel | 
|
Procession of king Ashoka on his chariot. The Emperor Asoka in his chariot with his retinue around.[98] |
| 3rd panel | 
|
The Cortège of Mara. According to Marshall, relating the panel to the next one on the inner face, deities are seen on foot, on horseback and on elephants, hastening to do homage to the Bodhisattva's locks.[98] |
| Left pillar, Inner face | ||
| Top panel |
|
Bodhi tree temple of Bodh Gaya built by Ashoka. The temple around the Bodhi Tree (the pipal tree beneath which the Buddha had attained enlightenment) was erected by Asoka himself. This Temple is hypaethral. Here the sanctity of the tree is indicated by umbrellas and garlands, and on the throne inside the shrine are three triratna symbols.[98] |
| 2nd panel |
|
Ashoka in grief, supported by his two Queens. Ashoka is in grief as he saw the pipal tree of the Buddha being neglected by the jealous Queen Tishyarakshita. He is so shocked that he has to be supported by two of his wives. He would thereafter build a temple around the tree, seen in the panel above, and which would become the sacred temple of Bodh Gaya.[99][98] |
| 3rd panel | 
|
Worship of the Bodhisattva's hair. In the lowest panel of the inner face is a company of deities in the Trayastrimsa heaven, where Indra held sway, rejoicing over and worshiping the hair of the Bodhisattva. The story told in the Buddhist scriptures is that, before embracing a religious life, Gautama divested himself of his princely garments and cut off his long hair with his sword, casting both hair and turban into the air, whence they were borne by the devas to the Trayastrimsa heaven and worshiped there.[98]
This particular relief was dedicated by the Guild of Ivory Carvers of Vidisha (horizontal inscription on the lintel), suggesting that a part of the gateways at least was made by ivory carvers.[41] At the least, the delicacy of workmanship and spatial effect attained in the panel of the Trayastrimsa heaven is particularly striking, and makes it understandable that, as the inscription on it records, it was the work of ivory-carvers of Vidisha. The inscription reads: 'Vedisehi dantakarehi rupadamam katam' meaning "The ivory-carvers from Vidisha have done the carving".[44][100] Some of the Begram ivories or the "Pompeii Lakshmi" give an indication of the kind of ivory works that could have influenced the carvings at Sanchi. |
| Left pillar, Rear face | ||
| Unique panel | 
|
To the left of the panel, a royal figure is seated beneath a canopy, holding a female by the hand; in the middle, another female seated on a low stool; to the right, two other figures standing, with a child behind bearing a garland (?). At the back of them is a plantain tree, and above, a Chaitya's window with an umbrella on either side. The meaning of this scene is uncertain.[98] |
| Right pillar | ||
| Blank. All reliefs and inscriptions lost. | ||
Stupa 1 Northern Gateway
[සංස්කරණය]The Northern Gateway is the best preserved of all the gateways, and was the second to be erected. The numerous panels relate various events of the life of the Buddha. Only one atypical panel (Right pillar, Inner face/ Top panel) shows Foreigners making a dedication at the Southern Gateway of Stupa No 1.
| Northern Gateway ("Great Stupa" No1, Sanchi. 1st century BCE.) | ||

|
The Northern Gateway of Stupa 1. The Northern Gateway of Stupa 1 is one of the four richly carved gateways or toranas, surrounding Stupa 1, the "Great Stupa". The Northern Gateway was the second to be erected.
The best preserved of all four gateways is the Northern one, which still retains most of its ornamental figures and gives a good idea of the original appearance of all the gateways. Like the other gateways, the Northern Gateway is composed of two square pillars surmounted by capitals, which in their turn support a superstructure of three architraves with volute ends.[96] | |
| Architraves | ||

Front architraves |

Rear architraves |
The architraves are all almost intact. They are crowned by two large decorated Shrivatsa symbols in the round, symbols of Buddhism, as well as the remnants of a Dharmachakra (Wheel of the Law) at the center. The lintels have seated lions and Yakshinis, also in the round, at their ends. |
|
Rear central architrave |
 Temptation of the Buddha with Mara and his daughters, and the demons of Mara fleeing. Towards the left end of the panel is the pipal tree at Bodh Gaya with an umbrella and streamers above, and, in front, the diamond throne (Vajrasana) of the Buddha, whereon he sat when he withstood the temptations and threats of Mara, the Satan of Buddhism, and when he attained to Buddhahood. Human and celestial beings are adoring it. The figure to the left of it is perhaps Sujata, bringing the meal which she prepared for Gautama before he began his last meditation prior to his enlightenment. Near the middle of the panel is Mara, seated on a throne with attendants around, and advancing from him towards the throne are his daughters, who sought by their blandishments to seduce Gautama from his purpose. On his other side, i.e., in the right half of the panel, are the hosts of Mara's demons, personifying the vices, the passions and the fears of mankind. The vigor and humor with which these fantastic beings are portrayed is very striking, and far more forceful than anything of the kind produced by the artists of the Greco-Buddhist art of Gandhara.[101] | |
| Pillar capitals | ||

Left |

Right |
Elephants facing the four directions decorate the top of the gateway pillars and support the architraves. They are gathered around a central pillar of square section decorated with a large flame palmette design. The capitals are flanked by a dancing Yakshini under foliage. |
| Pillars | ||
| External faces | ||
Left |
Right |
Left. The external side of the left pillar (facing the east) doesn't have narrative reliefs, but only displays Buddhist symbols as well as intricate vegetal designs. The external face is separated vertically in three bands, the central band consisting in a superposition of numerous flame palmettes (nine in total), and the two external bands consisting in a superposition of hooks holdings garlands. The bottom of the pillar face has two footprints of the Buddha with a wheel of the Law on their sole. The pillar face is crowned by a decorated Shrivatsa symbol.[102]
Right. The external face on the right side has the same background decoration, with the three vertical bands and the superposition of flame palmettes, and hooks holdings garlands, but lacks the bottom and top symbols of the Buddha footprint and the decorated Shrivatsa. |
| Left pillar, Front face (Most of the scenes on this face appear to relate to Sravasti.) | ||
| Top panel | _Sanchi_Stupa_1_Northern_Gateway.jpg)
|
 Great Miracle at Sravasti (also called Mango Tree Miracle, when the Buddha walks in the air). In the anthropomorphic (non-aniconic) Greco-Buddhist art of Gandhara, the Buddha would simply be shown in his human form, rising slightly in the air, with flames springing from his feet and water emanating from his shoulders. |
| 2nd panel | 
|
Jetavana of Sravasti, showing the three preferred residences of the Buddha.
 The Jetavana at Sravasti, showing the three favourite residences of the Buddha: the Gandhakuti, the Kosambakuti and the Karorikuti, with the throne of the Buddha in the front of each. The Jetavana garden was presented to the Buddha by the rich banker Anathapindika, who purchased it for as many gold pieces as would cover the surface of the ground. Hence, the foreground of the relief is shown covered with ancient Indian coins ( karshapanas ), just as it is in the similar relief at Bharhut, where the details of the coins are more in evidence.[102] |
| 3rd panel | 
|
Aerial promenade of the Buddha. Presumably, the long band on top of the heads of devotees is the promenade the Buddha is walking on. The long open pavilion (mandapa) calls to mind the one at Sravasti, which is portrayed in the Bharhut relief.[102] |
| 4th panel | 
|
Procession of King Prasenajit of Kosala leaving Sravasti to meet the Buddha. A royal procession issuing from a city gate, probably Prasenajit of Kosala going forth from Sravasti to meet the Buddha.[102] |
| 5th panel | _Sanchi_Stupa_1_Northern_gateway.jpg)
|
Paradise of Indra (nandana). The meaning of this scene, which is analogous to several others on the gateways, is not clear. Perhaps, like the scene on the gateways of
Stupa No3, it may represent the Paradise of Indra (nandana), where pleasure and passion held sway.[102] |
| Left pillar, Inner face (This face refers particularly to Rajagriha) | ||
| Top panel | 
|
 Visit of Indra to the Buddha in the Indrasaila cave near Rajagriha. In the upper part of the panel is an artificial cave resembling in its facade many rock-cut Buddhist chaitya shrines in Western and Central India. In front of the door is the throne which marks the presence of the Buddha. The animals peering out from among the rocks serve to indicate the wildness of the spot. Below is the company of Indra in attitudes of worship, but which of these figures represents Indra and which his musician Panchasikha who accompanied him, it is not possible to determine.[102] |
| 2nd panel | 
|
Royal cortege leaving Rajagriha. A king and his royal cortege issuing from a city. As the panel on this side of the pillar relates particularly to Rajagriha, it is probable that the King is either Bimbisara or Ajatasatru, on a visit to the Buddha at the Gridhrakuta Hill, and that the city is Rajagriha.[102] See also: Siddhartha and King Bimbasara (in "The Life of Buddha"). |
| 3rd panel | _at_Rajagriha,_the_visit_of_Bimbisara.jpg)
|
Bamboo garden (Venuvana) at Rajagriha, the visit of Bimbisara. The Bamboo garden (Venuvana ) at Rajagriha, with the throne of the Buddha in the center and devotees around. The identity of the spot is indicated by the bamboos on either side of the panel.[102] This event refers to a visit of King Bimbisara to the Buddha.[102] |
| 4th panel | 
|
Dvarapala guardian deity. Positioned as it is, in the inside panel of the gateway, the deity guards the left side of the entrance to the stupa. This Dvarapala is faced by another one on the right side. |
| Right pillar, Inner face | ||
| Top panel | 
|
Foreigners making a dedication to Southern Gateway of the Great Stupa. Probably the dedication of a stupa, but it might also refer to the death (parinirvana) of the Buddha. Among the crowds who are celebrating the occasion with music and dancing, some are wearing dresses and high boots suggestive of a cold climate. The individual and realistic features of the people can also be noticed.[103] The official notice at Sanchi reads "Foreigners worshiping Stupa". The relief shows 18 of these foreigners and 4 Gandharva celestial deities in the sky above.  These have been called "Greek-looking foreigners"[104] wearing Greek clothing complete with tunics, capes and sandals, typical of the Greek travelling costume,[78] and using Greek and Central Asian musical instruments ( the double flute aulos, or the carnyx-like Cornu horns), possibly pointing to the Indo-Greeks. |
| 2nd panel | 
|
Offering of a bowl of honey to the Blessed One by a monkey. The offering of a bowl of honey to the Blessed One by a monkey. The Buddha is here represented by his pipal tree and throne, to which devotees are doing obeisance. The figure of the monkey is twice repeated, first with the bowl and then with empty hands after the gift has been made. The incident is portrayed in much the same way on the reliefs of the Greco-Buddhist art of Gandhara.[103] |
| 3rd panel |
|
Miracle at Kapilavastu. Suddhodana praying as his son the Buddha rises in the air, praised by celestial beings (only his path is visible). This panel is to be interpreted in conjunction with the corresponding panel adjoining it on the front face of the same pillar. When Buddha returned to his native city of Kapilavastu, his father Suddhodana came forth with a royal retinue to meet him, and a question of etiquette arose as to which should salute the other first: the father, who was king, or the son, who had become the Buddha. Thereupon the Buddha solved the difficulty by walking miraculously in mid-air. Here, in the panel on the inner face, we see a banyan tree, and, in front of it, the throne symbolizing the Buddha; while suspended in the air above it is the chahkrama or promenade on which the Buddha used to take his exercise and which here symbolises that he is walking in the air. Above it are celestial beings (gandharvas) with garlands in their hands. To the right of the tree is King Suddhodana with attendants, one of whom is holding the royal umbrella. The reason for the banyan tree (Ficus Indica, Skr : nyagrodha) is that King Suddhodana presented a park of banyan trees to his son on his return, and the tree, therefore, helps to localize the incident. In the corresponding scene on the front face the Buddha is probably represented in this park with disciples (but invisible due to aniconism) and followers around him.[103] |
| 4th panel | 
|
Dvarapala guardian deity. Positioned as it is, in the inside panel of the gateway, the deity guards the right side of the entrance to the stupa. This Dvarapala is faced by another one on the left side. |
| Right pillar, Front face | ||
| Top panel | 
|
.jpg) |
| 2nd panel | 
|
The Great Departure of the Buddha from Kapilavastu. A royal figure in a chariot drives forth from a city gate, with a horse in front. The scene is analogous to the scene of Buddha's departure from Kapilavastu on the East Gateway, but in that case there is no chariot, and in this case there is no umbrella above the horse to indicate the presence of the Buddha. However, a royal umbrella being held over an empty spot in the chariot would suggest the presence of the Buddha. The figure standing at its side with a water-pot (bhrihgara) in his hand indicates that a gift is being made. Alternatively, it could be King Suddhodana going forth from Kapilavastu to meet his son, the Buddha, on the occasion when he presented him with a park of mango trees.[105] See also Siddhartha Leaves His Father's Palace (in "The Life of Buddha"). |
| 3rd panel | 
|
Teaching the Sakyans: This panel may represent the Buddha teaching the Sakyans. It can also be interpreted in relation to the panel of the Miracle at Kapilavastu on the same pillar (Right pillar, Inner face,3rd panel). When Buddha returned to his native city of Kapilavastu, his father Suddhodana came forth with a royal retinue to meet him, and the Buddha performed his Miracle of the Walk in the Air. In this scene, on the front face of the pillar, the Buddha is probably represented in this very park with disciples and followers around him.[105] |
| 4th panel | 
|
Unidentified broken scene. |
Stupa 1 Eastern Gateway
[සංස්කරණය]The Eastern Gateway describes historical events during the life of the Buddha, as well as several miracles performed by the Buddha. It was the third gateway to be erected.
| Eastern Gateway ("Great Stupa" No1, Sanchi. 1st century BCE/CE.) | ||
|
|
The Eastern Gateway of Stupa 1. The Eastern Gateway of Stupa 1 is one of the four richly carved gateways or toranas, surrounding Stupa 1, the "Great Stupa". It is the third gateway to have been constructed. Like the other gateways, the Southern Gateway is composed of two square pillars surmounted by capitals, which in their turn support a superstructure of three architraves with volute ends.[96] | |
| Architraves | ||

Front architraves |

Rear architraves |
The architraves are all almost intact. They were crowned by two large decorated Shrivatsa symbols in the round, symbols of Buddhism (only one of them remains). The lintels have elephants mounted by Mahuts, and a single seated lion, at their ends. A single remaining Yakshini (top right corner) suggests that many more have been lost. |
 Front architrave, center |
The Great Departure. During the night, Prince Siddharta leaves the Palace of Kapilavastu (far left) while his wife Yasodhara, his baby Rahula and the dancers are sleeping. Siddharta rides his horse Kanthaka, who is being lifted above the ground by Yakshas in order not to make noise and to avoid awakening the guards. The horse is seen progressing from left to right, away from the city, and progressively higher in the air. Siddharta is not visible, but a chatra royal parasol is held by Chandaka in order to signify the fact that Siddharta is riding on the horse. After his arrival in the forest on the right, Siddharta discards his robes, cuts off his hair and returns the horse to Chandaka. The horse is seen returning without a rider, walking on the ground this time, and, of course, devoid of the chatra parasol over it this time. When Siddharta stays in the forest, he is symbolized by the two soles of his feet (extreme right). Siddharta has renounced the world.[106] | |
| Central front architrave, right |
|
The famous Yakshini, under foliage and hanging in front of an elephant, on the side.of the East Gateway. |
| Pillar capitals | ||
| Right capital | 
|
The pillars of the Eastern Gateway feature elephants in the four direction, conducted by mahuts holding a Buddhist banner. They are gathered around a pillar of square section, decorated with a flame palmette design. A Yakshini under foliage flanks them on the side. |
| Pillars | ||
| Left pillar, Front face | ||
| Top panel | 
|
The Miracle of Walking in the air at Savrasti. While the Buddha walks in the air, devotees are aligned and look upwards. The Buddha is not visible (aniconism), and only his path (chankrama) is, separating the panel horizontally in two parts. |
| 2nd panel | 
|
 Temple for the Bodhi Tree in Bodh Gaya. The throne was discovered after excavations near the location of the Bodhi tree in the 19th century, and is now revered at the Mahabodhi Temple in Bodh Gaya. |
| 3rd panel | 
|
Miracle of the Buddha walking on the River Nairanjana. The Nairanjana river is shown in flood and Kasyapa accompanied by a disciple and a boatman are hastening in a boat to the rescue of the Buddha. Then, in the lower part of the picture, the Buddha, represented by his promenade (chahbama), appears walking on the face of the waters, and in the foreground the figures of Kasyapa and his disciple are twice repeated, now on dry ground and doing homage to the Master (represented by the throne at the right hand, bottom corner).[107] Throughout, The Buddha is not visible (aniconism), only represented by a path on the water, and his empty throne bottom right.[107] |
| Bottom panel | 
|
Bimbisara with his royal cortege issuing from the city of Rajagriha to visit the Buddha. Bimbisara with his royal cortege issuing from the city of Rajagriha, on a visit to the Buddha, here symbolized by his empty throne. This visit took place after the conversion of Kasyapa, which was brought about by a series of miracles, one of which is illustrated in the panel above.[107] |
| Left pillar, Inner face (This face is concerned with the miracles by which Buddha converted the Brahman Kasyapa and his disciples.) | ||
| Top panel | 
|
Visit of Indra and Brahma to the Buddha. The visit of Indra and Brahma to the Buddha takes place in the town of Uruvilva. Near the center of the panel is the throne indicating the presence of the Buddha, surmounted by the umbrella; behind it, Indra and Brahma standing in an attitude of adoration; in the background, the houses of Uruvilva and the people at their daily tasks. To the left, a man and woman, the woman grinding spices on a "cari" stone; nearby, to the right, another woman is at work at a table, while a third is pounding rice with pestle and mortar, and a fourth winnowing the grain with a fan. In the foreground is the river Nairanjana, with cattle on its banks and a woman drawing water in a pitcher. One of the villagers has his hands joined in the attitude of prayer.[107] |
| 2nd panel | 
|
Buddha tames the Naga at Uruvilva This panel is about the victory of the Buddha over the serpent in the fire chapel at Uruvilva. The Buddha obtained the permission of Kasyapa to pass the night in a fire chapel at his hermitage, which was inhabited by a fearsome Naga. The Naga attacked him with smoke and fire but was met with the same weapons, and being overcome crept into the Buddha's begging bowl. In the middle of the panel is the fire temple with a fire altar in front and a throne indicating the presence of the Buddha within, while behind the throne is the five-headed Naga. Flames are issuing from the windows in the roof. On either side of the temple are the Brahmanical ascetics standing in an attitude of respect and veneration. In the foreground, to the right, is a leaf-hut (parna-sala) and an ascetic at its threshold seated on a mat, with his knees bound up by a band and his hair (jafa) twisted turban-wise about his head. Evidently he is a Brahman doing penance. Before him is another Brahman standing and apparently reporting to him the miracle; and near by is a small fire altar and the instruments of Vedic sacrifice. To the left is the Nairanjana river, in which another ascetic is bathing and from which three young novices are drawing water.[107] |
| 3rd panel | 
|
The miracle of fire and wood. This is a depicting of the miracles of the wood, the fire and the offering. In the story of Kasyapa's conversion it is related that, after the miracle of the fire temple, a sacrifice was prepared by the Brahmans, but the wood for the fire could not be split, the fire could not be made to burn, and the oblation could not be offered, until in each case the Buddha gave his consent. In the relief, this triple miracle is dramatically represented. In the foreground, to the right, a Brahman ascetic has his axe raised to split the wood, but the axe will not descend until Buddha gives the word; then we see the axe driven home into the log. Similarly, a Brahman is engaged fanning the fire on an altar, but the fire will not burn until the Buddha permits it. Then we see the altar repeated and flames blazing upon it. The third phase of the miracle, that of the oblation, is indicated by the single figure of a Brahman holding an oblation spoon over a flaming altar. |
| Bottom panel | 
|
Dvarapala guardian. |
| Right pillar, Inner Face (This face of the pillar is devoted to scenes at Kapilavastu, the birthplace of Gautama) | ||
| Top panel | 
|
Homage of King Suddhodana to the Buddha. In the center, the tree and throne of the Buddha, with a group of worshipers around, including King Suddhodana, the father of the Buddha, who is standing immediately in front of the throne. The king wears the same headdress here as in the panel below. The episode represented is the homage paid by the King
to his son after his return to Kapilavastu.[107] |
| Second panel | 
|
Procession of king Suddhodana from Kapilavastu.
 At the top is portrayed the dream of Maya, the mother of the Buddha, otherwise called the conception of the Bodhisattva. Maya, the queen, is
seen lying in a pavilion of the palace, and on her is descending the Bodhisattva in the form of a white elephant. This scene, which was well known to all Buddhists, serves to identify the city here represented as Kapilavastu. |
| Bottom panel | 
|
Dvarapala guardian. |
| Right pillar, Front Face | ||
| Full length | 
|
The six inferior heavens of the Gods. The six inferior heavens of the gods (Devalokas ) or "Kamavachara heavens", in which the passions are still unsubdued, an integral part of Buddhist cosmology. Starting from the base they are as follows: (1) The heaven of the Four Great Kings: the Regents of the Four Quarters (Lokapala; Chaturmaharajika); (2) The heaven of the Thirty-three gods (Trayastrimisa) over whom Sakra presides; (3) The heaven over which Yama, the God of Death, reigns, where there is no change of day or night; (4) The Tushita heaven, where the Bodhisattvas are born before they appear on earth as the saviors of mankind, and where Maitreya now resides; (5) The heaven of the Nirmanarati, who create their own pleasures; (6) The heaven of the Parinirmita-Vasavartin gods, who indulge in pleasures created for them by others and over whom Mara is king. Each of these six heavens or devalokas is represented by a storey of a palace, the front of which is divided by pillars into three bays, the pillars in the alternate storeys being
either plain or provided with elaborate Persepolitan capitals. In the central bay there sits a god, like an Indian king, holding a thunderbolt (vajra) in his right hand and a flask containing nectar (amrita) in his left. Behind him are his women attendants holding the royal umbrella (Muttra) and flywhisk (chauri). In the bay to his right, seated on a slightly lower seat, is his viceroy (uparaja); and to his left are the court musicians and dancers. With slight variations the same figures are repeated in each of the six heavens.
Nothing, perhaps, could give a better idea of the monotony of pleasure in the Buddhist heavens than the sameness of these reiterations. |
Stupa 1 Western Gateway
[සංස්කරණය]The Western Gateway of Stupa 1 is the last of the four gateway of the Great Stupa to have been built.
| Western Gateway ("Great Stupa" No1, Sanchi, 1st century BCE/CE.) | ||

|
The Western Gateway of Stupa 1. The Western Gateway of Stupa 1 is one of the four richly carved gateways or toranas, surrounding Stupa 1, the "Great Stupa". It is the last of the four gateway to have been constructed.
Like the other gateways, the Western Gateway is composed of two square pillars surmounted by capitals, which in their turn support a superstructure of three architraves with volute ends.[96] | |
| Architraves | ||

Front architraves |

Rear architraves |
The architraves are all almost intact, but there are almost no remains of "in the round" decorations around or on top of the lintels. Only remains a fragment of capital with a base composed of lions, at the center top of the torana. |

Rear top architrave |
King of the Mallas bringing the relics of the Buddha to Kushinagara. After the death of the Buddha his relics were taken possession of by the Mallas of Kushinagara, whose chief is here depicted riding on an elephant and bearing the relics into the town of Kusinagara on his own head. The tree behind the throne in front of the city gate appears to be a Shala tree ( shorea robusta ), and to refer to the fact that Buddha's parinirvana took place in a grove of those trees. The two groups of figures carrying banners and offerings, which occupy the ends of this architrave, are probably connected with the central scene, serving to indicate the rejoicing of the Mallas over the possession of the relics.[109] | |

Rear middle architrave |
 Siege of Kushinagara by the seven kings. This is another portrayal of "The war of the relics" (see Southern Gateway architrave). Here the seven rival claimants, distinguished by their seven royal umbrellas, are advancing with their armies to the city of Kushinagara, the siege of which has not yet begun. The seated royal figure at the left end of the architrave may represent the chief of the Mallas within the city. The princely figures in the corresponding relief at the right end appear to be repetitions of some of the rival claimants.[109] | |

Rear bottom architrave |
Temptation of the Buddha with Mara's army fleeing. This scene extends over the three sections of the architrave, In the center is the temple of Bodh Gaya with the pipal tree and the throne of the Buddha within; to the right, the armies of Mara fleeing discomfited from the Buddha; to the left, the devas celebrating the victory of the Buddha over the Evil One and exalting his glorious achievements. The temple at Bodh Gaya, which enclosed the Bodhi tree, was built two centuries later by Emperor Ashoka. Its portrayal in this scene, therefore, is an anachronism.[109] | |
| Pillar capitals | ||

Left |

Right |
The pillar capitals consist in groups of four Yakshas (tectonic deities) supporting the architraves. |
| Pillars | ||
| Left pillar, Front face | ||
| Unique panel | 
|
Paradise of Indra. Probably the "Paradise of Indra" (nandana) with the river Mandakini in the foreground. This can be related to the scenes on the North Gateway and on the small gateway of the Third Stupa.[109] |
| Left pillar, Inner face | ||
| Top panel | 
|
Syama Jataka Syama, the Buddha in a previous life, was the only son of a blind hermit and his wife, whom he supports with devotion. One day, Syama goes to draw water at the river and is shot with an arrow by the King of Benares, who is out hunting. Owing to the king's penitence and his parents' sorrow Indra intervenes and allows Syama to be healed and his parents' sight to be restored. At the right hand top corner of the panel arc the two hermitages with the father and mother seated in front of them. Below them their son Syama is coming to draw water from the stream. Then, to the left, we see the figure of the King thrice repeated, first shooting the lad in the water, then with bow in hand, then standing penitent with bow and arrow discarded; and in the left top corner are the father, mother and son restored to health, and by their side the god Indra and the king. The Buddha in a previous life was thus given as an example of filial piety.[110] |
| 2nd panel | 
|
Enlightenment of the Buddha with the Nagas rejoincing. The scene depicts the enlightenment (sambodhi ) of the Buddha. In the center is the throne of the Buddha beneath the pipal tree, which is being garlanded by angels (gandharvas); round about are the Nagas and Nagis celebrating the victory of the Buddha over Mara.[111] See also: Siddhartha Becomes the Buddha (in "The Life of Buddha"). |
| Bottom panel | 
|
 Miraculous crossing of the Ganges by the Buddha when he left Rajagriha to visit Vaisali (partial remain). Only the upper part of this panel remains, but it appears to depict the miraculous crossing of the Ganges by the Buddha when he left Rajagriha to visit Vaisali. |
| Right pillar, Inner Face | ||
| Top panel | 
|
Enlightenment of the Buddha with Mara's army fleeing. The enlightenment (sambodhi) of the Buddha. Towards the top of the panel is the pipal tree and the throne of the Buddha, and round them a throng of worshipers, men and women, gods and animals. It is the moment after the discomfiture of Mara and his hosts. The Nagas, winged creatures, angels and archangels, each urging his comrades on, went up to the Great Being at the Bodhi tree's foot and as they came they shouted for joy that the sage had won; that the Tempter was overthrown. The deva with the giant head, riding either on the elephant or on the lion to the right of the panel, is probably meant to be Indra or Brahma. The interpretation of the three sorrowing figures standing on three sides of the throne in the foreground is problematical. In the Mahabhinishkramana scene on the East Gateway we have already seen that the artist inserted a jambu tree in the middle of the panel, to remind the spectator of the first meditation of the Bodhisattva and the path on which it led him. So, here, these three figures, which are strikingly similar to the three sorrowing Yakshas in the Mahdbhinishkramana scene and were probably executed by the same hand, may be a reminder of the Great Renunciation which led to the attainment of Buddhahood, the gateway behind being also a reminder of the gateway of Kapilavastu.[109] |
| Second panel | 
|
The Gods entreating Buddha to preach. The gods entreating the Buddha to preach. The Buddhist scriptures tell us that after his enlightenment the Buddha hesitated to make known the truth to the world. Then Brahma, Indra, the four Lokapalas (Regents of the Four Quarters) and the archangels of the heavens approached him and besought him to turn the Wheel of the Law. It was when the Buddha was seated beneath the banyan tree (nyagrodha) shortly after his enlightenment, that this entreaty was made, and it is a banyan tree with the throne beneath that is depicted in this relief. The four figures side by side in the foreground may be the four Lokapalas.[109] See also: The Buddha is Prepared to Preach the Doctrine (in "The Life of Buddha"). |
| Bottom panel | 
|
Dvarapala guardian. |
| Right pillar, Front Face | ||
| Top panel | 
|
Mahakapi Jataka. The story runs that the Bodhisattva was born as a monkey, ruler over 80,000 monkeys. They lived at a spot near the Ganges and ate of the fruit of a great mango tree. King Brahmadatta of Benares, desiring to possess the mangoes, surrounded the tree with his soldiers, in order to kill the animals, but the Bodhisattva formed a bridge over the stream with his own body and by this means enabled the whole tribe to escape into safety. Devadatta, the jealous and wicked cousin of the Buddha, was in that life one of the monkeys and, thinking it a good chance to destroy his enemy, jumped on the Bodhisattva's back and broke his heart. The king, seeing the good deed of the Bodhisattva and repenting of his own attempt to kill him, tended him with great care when he was dying and
afterwards gave him royal obsequies. |
| 2nd panel | 
|
The Bodhisattva preaching in the Tushita Heaven. In the center of the panel is the tree and throne of the Buddha, and round about the throne a company of gods standing upon clouds in attitudes of adoration. At the top of the panel are gandharvas bringing garlands and below them, on each side of the
tree, come Indra and Brahma, riding on lion-like creatures. A conventional method is used to depict the clouds beneath the feet of the gods in the foreground and among the figures in the upper part of the panel. They have the appearance almost of rocks with flames breaking from them.[109] |
| 3rd panel | 
|
The visit of Sakra. The Buddha, represented by his throne, beneath a flowery tree with hills and jungle around. Possibly the tree is the Rajayatana tree at Bodh Gaya, beneath which the Buddha sat shortly after his enlightenment. The figures in the foreground adoring the Buddha appear to be devas.[109] |
| 4th panel | 
|
Heraldic lions. Three heraldic lions standing on conventionalized floral device. The turn in the upper leaves is peculiar. This method of treating foliage is peculiar to the Early School and is never found in later work. The inscription over this panel records that the pillar was a gift of Balamitra, pupil of Ayachuda (Arya-kshudra).[109] |
Stupa 3 Southern Gateway
[සංස්කරණය]The gateway of Stupa No 3, is the last of all the Satavahana gateways that were built at Sanchi. It is located to the immediate south of Stupa No 3, is smaller than the four gateways encircling the Great Stupa. It is also slightly older, and generally dated to the 1st century CE.
| Southern Gateway (Stupa No 3, Sanchi. 1st century CE.) | ||

|
The gateway of Stupa No 3, located to the immediate south of Stupa No 3, is smaller than the four gateways encircling the Great Stupa. It is also slightly older, and generally dated to the 1st century CE. This gateway stands 17 feet high, and is adorned with reliefs in the same style as those on the gateways of the Great Stupa. Indeed, the majority of these reliefs are mere repetitions of the subjects and scenes portrayed on the larger gateways, with a few exceptions, especially the front face of the lowest architrave.[113] | |
| Architraves | ||
Front architraves
|
Architrave posts, or "false capitals", are roughly square-shaped and can be seen at the junction between architrave and pillar, and between the architraves themselves. Here, there are nine of them altogether on just the surface of the front architraves.
| |

Top front architrave |
 Genies among foliage forming scrolls. This kind of scrolls are generally considered to be of Hellenistic origin, and were to be used extensively in the Greco-Buddhist art of Gandhara as well.[114][115] | |

Middle front architrave |
Buddhas represented by a Chaitya and two Bodhi Trees and empty thrones. | |
.jpg)
Bottom front architrave |
The only scene which differs materially from those on the gateways of the Great Stupa is the one delineated on the front face of the lowest architrave, which appears to represent the Heaven of Indra (Nandanavana). In the centre is the pavilion of the god, with Indra himself seated on a throne surrounded by women attendants. In the foreground is the river MandakinI, which bounds the heaven of Indra, and to right and left of the pavilion are mountains and jungle forming a pleasure-garden for the gods and demigods who are taking their case therein. Then, in the corners next to the false capitals, are Naga kings seated with their attendants on the folds of seven-hooded Nagas, whose coils mingled with the waters of the river are carried through to the ends of the architrave, and go to form the spirals adorning its extremities. The sea monsters (Makaras) and the heroes wrestling with them, which are portrayed on the false capitals of this architrave, are particularly appropriate in this position, where their coils combine effectively with those of the Nagas.[113] | |
Rear architraves |
Ordered left to right, from top to bottom:
| |
| Pillar capitals | ||

Left |

Right |
The pillar capitals consist in groups of four Yakshas (tectonic deities) supporting the architraves. This choice is similar to the last of the gateways of the Great Stupa, the Western Gateway. |
| Pillars | ||
| Left pillar, Front face | ||

|
The variety and the detail of the pillar panels is much less than at the Great Stupa. Here the first panel shows the adoration of a stupa by four Indian devotees. Then, other devotees simply line up in the second and the third panels below.
| |
| Left pillar, Inner face | ||
.jpg)
Top panel. |
Worshipping the Bodhi Tree. This classic and rather simply depicted scene is again the unique didactic scene on this face of the pillar. The following panel in only composed of aligned devotee, and at the bottom is a panel with Dvarapala guardian deity as seen on the other gateways, or possibly a devotee, as he seems not to be armed.
| |
| Left pillar, Rear face | ||
.jpg)
Top panel. |
Uncharacteristically, the rear panel of the left pillar of the gateway is fully decorated, down to its bottom. This can be explained by the fact that the stupa is not surrounded by a railing as in the Great Stupa, therefore rendering this rear space free. The right pillar of the gateway however does not have decoration on the back. The top panel is the Dharmacakra on a Pillar.
| |
| Right pillar, Inner Face | ||
.jpg)
Top panel. |
Worshipping the Bodhi Tree. This classic and rather simply depicted scene is again the unique didactic scene on this face of the pillar. It even faces a similar "Worshipping the Bodhi Tree" scene on the pillar surface facing it across the entrance. The next panel going down is only composed of aligned devotees, and at the bottom is a panel with Dvarapala guardian deity as seen on the other gateways, or possibly a devotee, as he seems not to be armed.
| |
| Right pillar, Front Face | ||

|
 Again variety and the detail of the pillar panels is much less than at the Great Stupa. The first panel however is extremely interesting, as it shows the adoration of what looks like the pillar of Ashoka at the Southern Gateway of the Great Stupa. Then other devotees simply line up in the second and the third panels below.
| |


.jpg)
.jpg)
.jpg)
.jpg)
.jpg)
.jpg)
.jpg)
.jpg)
.jpg)
.jpg)
.jpg)
.jpg)


.jpg)
.jpg)
.jpg)

.jpg)
.jpg)


පසුකාලීන යුග
[සංස්කරණය]
12වන සියවස තෙක්ම මෙම සංකීර්ණය වෙත තවත් ස්තූප සහ වෙනත් බෞද්ධ ගොඩනැගිලි ගණනාවක්ම ඉදි විය.
බටහිර ක්ෂත්රපයෝ
[සංස්කරණය]ක්රි.පූ./ක්රි.ව. 1වන සියවස්වල සාංචි ප්රදේශයේ සාතවාහන පාලනය පැවති බවට සාතකර්ණී නමයෙන් නිකුත් කළ වීදිශා, උජ්ජෛන් සහ ඒරාන් ප්රදේශවලින් හමුවූ සාතවාහන තඹ කාසි මෙන්ම, ස්තූප අංක 1 හි දකුණු තොරණෙහි වූ සාතකර්ණී සෙල්ලිපිය සාක්ෂ්ය සපයයි.[116]
ඉන් මඳ කලකට පසුව, මෙම ප්රදේශය සිතියානු බටහිර ක්ෂත්රපයන්ගේ, විශේෂයෙන් නාහපාන (ක්රි.ව. 120) රජුගේ ග්රහණයට නතු විය.[117] ඉන් අනතුරුව නිසැකැවම එය පළමුවන රුද්රදාමන් (ක්රි.ව. 130-150) පාලනයට නතුවූ බව ඔහුගේ ජුනාගාධ් අභිලේඛන මඟින් පෙනී යයි.[116] සාතවාහනයන් මඳ කලකට සිය පාලනය බලය යළි ලබාගන්නට සමත් වුවද, ක්රි.ව. 3වන සියවසේ මැද භාගය වන විට බලය නැවතත් දෙවන රුද්රසේන (ක්රි.ව. 255-278) යටතේ බටහිර ක්ෂ්ත්රපයන් සතු විය. බටහිර ක්ෂ්ත්රපයන් 4වන සියවස තෙක් බලයේ රැඳී සිටි බව අවට වූ කානකේර්හා අභිලේඛනය අනුව පෙනේ. එම සෙල්ලිපිය අනුව ශක ප්රධානී සහ "සාධාරණ Satraps remained well into the 4th century as shown by the nearby Kanakerha inscription mentioning the construction of a well by the Saka chief and "righteous conqueror" Sridharavarman, who ruled circa 339-368 CE.[116] Therefore, it seems that the Kushan Empire did not extend to the Sanchi area, and the few Kushan works of art found in Sanchi appear to have come from Mathura.[116] In particular, a few Mathura statues in the name of the Kushan ruler Vasishka (247-267 CE) were found in Sanchi.[118][119]
Guptas
[සංස්කරණය]The next rulers of the area were the Guptas.[116] Inscriptions of a victorious Chandragupta II in the year 412-423 CE can be found on the railing near the Eastern Gateway of the Great Stupa.[120]


"The glorious Candragupta (II), (...) who proclaims in the world the good behaviour of the excellent people, namely, the dependents (of the king), and who has acquired banners of victory and fame in many battles"
— Sanchi inscription of Chandragupta II, 412-413 CE.[122]
Temple 17 is an early stand-alone temple (following the great cave temples of Indian rock-cut architecture), as it dates to the early Gupta period (probably first quarter of 5th century CE). It may have been built for Buddhist use (which is not certain), but the type of which it represents a very early version was to become very significant in Hindu temple architecture.[123] It consists of a flat roofed square sanctum with a portico and four pillars. The interior and three sides of the exterior are plain and undecorated but the front and the pillars are elegantly carved, giving the temple an almost ‘classical’ appearance,[121] not unlike the 2nd century rock-cut cave temples of the Nasik Caves. The four columns are more traditional, the octagonal shafts rising from square bases to bell capitals, surmounted by large abacus blocks carved with back-to-back lions.[124]
Next to Temple 17 stands Temple 18, the framework of a mostly 7th-century apsidal chaitya-hall temple, again perhaps Buddhist or Hindu, that was rebuilt over an earlier hall. This was probably covered by a wood and thatch roof.[125]
Near the Northwern Gateway also used to stand a Vajrapani pillar. Another pillar of Padmapani used to stand, and the statue is now in the Victoria and Albert Museum, London.
Lion pillar No 26
[සංස්කරණය]
Pillar No26 stands a little to the north of the Sunga pillar No25. It belongs to the early Gupta age. Apart from its design, it is distinguished from the other pillars on the site by the unusual quality and colour of its stone, which is harder than that ordinarily quarried in the Udayagiri hill, and of a pale buff hue splashed and streaked with amethyst. At Sanchi this particular variety of stone was used only in monuments of the Gupta period. This pillar was approximately 22 ft. 6 in. in height and was composed of two pieces only, one comprising the circular shaft and square base, the other the bell-capital, necking, lions and crowning chakra. On the northwest side of the lowest section, which is still in situ, is a short mutilated inscription in Gupta characters recording the gift of the pillar by a viharasvamin (master of a monastery), the son of Gotaisimhabala.[126]

As was usual with pillars of the Gupta age, the square base projected above the ground level, the projection in this case being 1 ft. 2 in., and was enclosed by a small square platform. The lion capital of this pillar is a feeble imitation of the one which surmounted the pillar of Asoka, with the addition of a wheel at the summit and with certain other variations of detail. For example, the cable necking above the bell-capital, is composed of a series of strands bound together with a riband. Also, the reliefs on the circular abacus, consist of birds and lotuses of unequal sizes disposed in irregular fashion, not with the symmetrical precision of earlier Indian art. Finally, these lions, like those on the pillars of the Southern Gateway, are provided with five claws on each foot, and their modelling exhibits little regard for truth and little artistry.[126]
There has been much confusion about the dating of this pillars, since it was often presented from the beginning as a pillar of Ashoka. Marshall himself describes the pillar as early Gupta Empire in convincing terms, either from the points of view of material, technique or artistry.[126] The Government of India Photo Division describes it in this image as "An Asoka pillar and its broken lion capital near the south gateway of the Great Stupa." [7]. The British Library Online also describes it as 3rd century BCE Mauryan, although probably pasting the original text from the 19th century [8] සංරක්ෂණය කළ පිටපත 2021-04-20 at the Wayback Machine. Sachim Kumar Tiwary in Monolithic Pillars of The Gupta Period, affirms a Gupta date.[127] The Sanchi Archaeological Museum gives it a date of 600 CE, which would even put it beyond the Gupta period proper, at the time of the Later Gupta dynasty.[128]
ස්තම්භය 35
[සංස්කරණය]

The massive pillar near the North Gateway, numbered 35 in the plan, was erected during the Gupta period. Every feature, whether structural, stylistic or technical, is typical of Gupta workmanship. Most of the shaft has been destroyed, but the stump still remains in situ, and the foundations are intact. The form, too, of the platform around its base is sufficiently clear, and the capital and statue which it is said to have supported, are both relatively well-preserved. What remains of the shaft is 9 ft. in length, 3 ft. 10 in. of which, measured from the top, are circular and smooth, and the remainder, constituting the base, square and rough-dressed. In the Gupta age, it was the common practice to keep the bases of such monolithic columns square, whereas those of the Maurya age were invariably circular. The columns of the Maurya period are distinguished by its exquisite dressing and highly polished surface; but in this case the dressing of the stone is characterized by no such lustrous finish.[129]
The Persepolitan capital and square abacus ornamented with a balustrade in relief are cut entire from a single block of stone. So, too, is the statue which was found lying alongside the capital and which is believed to have belonged to the same pillar. This statue represents a man clad in a dhoti and adorned with bracelets, earrings, bejewelled necklace and headdress. The hair falls in curls over the shoulders and back, and beneath it at the back fall the ends of two ribbons.[129] It is thought that the statue represents Vajrapani. The attribution to Vajrapani is indicated by the stub of a vajra thunderbold in the right hand and a halo of 24 rays.[130] The dedication of the Vajrapani pillar is also mentioned in a 5th-century inscription.[131]
An interesting feature of the image is the halo which is pierced with twelve small holes evenly disposed around its edge. Manifestly the halo, is too small in proportion to the size of the statue, and these holes were no doubt intended for the attachment of the outer rays, which were probably fashioned out of copper gilt, the rest of the statue itself being possibly painted or gilded. This statue stood on the summit of the pillar, and is a work of the Gupta period.[129] The statue is currently in the Sanchi Archaeological Museum and is attributed to the 5th century CE.[132]
| ගුප්ත යුගයේ ශේෂයන් |
|
.JPG)


Following the destruction of the Guptas by the Alchon Huns, and with the decline of Buddhism in India, Buddhist artistic creation at Sanchi slowed down.

Temple 45 was the last Buddhist temple built during the mid to late 9th century.[134] Another point to be noted is that at that time the monuments were enclosed within a wall.
With the decline of Buddhism in India, the monuments of Sanchi went out of use and fell into a state of disrepair. In 1818, General Taylor of the Bengal Cavalry recorded a visit to Sanchi. At that time the monuments were left in a relatively good condition. Although the jungle had overgrown the complex, several of the Gateways were still standing, and Sanchi, being situated on a hill, had escaped the onslaught of the Muslim conquerors who had destroyed the nearby city of Vidisha (Bhilsa) only 5 miles away.[135]
සාංචි සහ ගන්ධාරයේ ග්රීක-බෞද්ධ කලාව
[සංස්කරණය]Although the initial craftsmen for stone reliefs in Sanchi seem to have come from Gandhara, with the first reliefs being carved at Sanchi Stupa No.2 circa 115 BCE,[27] the art of Sanchi thereafter developed considerably in the 1st century BCE/CE and is thought to predate the blooming of the Greco-Buddhist art of Gandhara, which went on to flourish until around the 4th century CE. The art of Sanchi is thus considered as the ancestor of the didactic forms of Buddhist art that would follow, such as the art of Gandhara.[136] It is also, with Bharhut, the oldest.[137]
As didactic Buddhist reliefs were adopted by Gandhara, the content evolved somewhat together with the emergence of Mahayana Buddhism, a more theistic understanding of Buddhism. First, although many of the artistic themes remained the same (such as Maya's dream, The Great Departure, Mara's attacks...), many of the stories of the previous lives of the Buddha were replaced by the even more numerous stories about the Bodhisattvas of the Mahayana pantheon.[136] Second, another important difference is the treatment of the image of the Buddha: whereas the art of Sanchi, however detailed and sophisticated, is aniconic,[138] the art of Gandhara added illustrations of the Buddha as a man wearing Greek-style clothing to play a central role in its didactic reliefs.[139][140]
The presence of Greeks at or near Sanchi at the time is known (Indo-Greek ambassador Heliodorus at Vidisha circa 100 BCE, the Greek-like foreigners illustrated at Sanchi worshiping the Great Stupa, or the Greek "Yavana" devotees who had dedicatory inscriptions made at Sanchi[83]), but more precise details about exchanges or possible routes of transmission are elusive.
| Sanchi and the Greco-Buddhist art of Gandhara | |||||
| Maya's dream | The Great Departure | Mara's attack | Enlightenment | The Buddha Preaching | |
| Sanchi (1st c. BCE/CE) |
Maya's dream of a white elephant. |
The Buddha, under the umbrella on the chariot, is not illustrated. |
The Buddha is symbolized by an empty throne. |
The Buddha is symbolized by an empty throne. |
The Buddha is symbolized by an empty throne. |
| Greco-Buddhist art of Gandhara (1st c.CE-4th c.CE) |
 Very similar illustration from Gandhara. |
 The Buddha in person leaves the city. |
_(12488794514).jpg) The Buddha is illustrated centrally. |
 The Buddha is illustrated centrally. |
 The Buddha is illustrated centrally. |
යුරෝපීයයන් විසින් යළි සොයාගැනීම
[සංස්කරණය]


General Henry Taylor (1784–1876) who was a British officer in the Third Maratha War of 1817–1819, was the first known Western historian to document in 1818 (in English) the existence of Sanchi Stupa. The site was in a total state of abandon. The Great Stupa was clumsily breached by Sir Herbert Maddock in 1822, although he was not able to reach the center, and he then abandoned.[141] Alexander Cunningham and Frederick Charles Maisey made the first formal survey and excavations at Sanchi and the surrounding stupas of the region in 1851.[142][141] Amateur archaeologists and treasure hunters ravaged the site until 1881, when proper restoration work was initiated. Between 1912 and 1919 the structures were restored to their present condition under the supervision of Sir John Marshall.[143]
19th Century Europeans were very much interested in the Stupa which was originally built by Ashoka. French sought the permission of Shahjehan Begum to take away the eastern gateway which was quite well preserved, to a museum in France. English, who had established themselves in India, majorly as a political force, were interested too in carrying it to England for a museum. They were satisfied with plaster-cast copies which were carefully prepared and the original remained at the site, part of Bhopal state. The rule of Bhopal, Shahjehan Begum and her successor Sultan Jehan Begum, provided money for the preservation of the ancient site. John Marshall, Director-General of the Archaeological Survey of India from 1902 to 1928, acknowledged her contribution by dedicating his important volumes on Sanchi to Sultan Jehan. She had funded the museum that was built there. As one of the earliest and most important Buddhist architectural and cultural pieces, it has drastically transformed the understanding of early India with respect to Buddhism. It is now a marvellous example of the carefully preserved archaeological site by the Archeological Survey of India. The place of Sanchi Stupa in Indian history and culture can be gauged from the fact that Reserve Bank of India introduced new 200 Indian Rupees notes with Sanchi Stupa in 2017.
Since Sanchi remained mostly intact however, only few artefacts of Sanchi can be found in Western Museum: for example, the Gupta statue of Padmapani is at the Victoria and Albert Museum in London, and one of the Yashinis can be seen at the British Museum.
Today, around fifty monuments remain on the hill of Sanchi, including three main stupas and several temples. The monuments have been listed among other famous monuments in the UNESCO World Heritage Sites since 1989.
The reliefs of Sanchi, especially those depicting Indian cities, have been important in trying to imagine what ancient Indian cities look like. Many modern simulations are based on the urban illustrations of Sanchi.[144]
-
 Great Stupa, Eastern Gateway, in 1875.
 -
 West Gateway in 1882.
 -
 South Gateway in 1882.
 -
 Great Stupa, Northern Gateway in 1861.
 -
 Temple 18 in 1861.
 -
 A vision of ancient Indian court life, using motifs from Sanchi (wood engraving, 1878).


.jpg)
චේතියගිරි විහාරය සහ ධාතූන් වහන්සේලා
[සංස්කරණය]
මේසී සහ කනිංහැම් විසින් සොයාගත් බෞද්ධ භික්ෂූන් වහන්සේලාගේ අස්ථි අවශේෂ සහ ධාතු කරඬු බෙදා සිහිවටන ලෙස එංගලන්තය වෙත රැගෙන යන ලදී.[145] මේසීගේ පවුල විසින් මෙම වස්තූන් වික්ටෝරියා සහ ඇල්බට් කෞතුකාගාරය වෙත අලෙවි කළ අතර, ඒවා එහි දිගු කාලයක් පැවතිණි. මහාබෝධි සංගමයේ මූලිකත්වයෙන් එංගලන්තය, ශ්රී ලංකාව සහ ඉන්දියාවේ විසූ බෞද්ධයෝ ඒවා නැවත භාරදෙන මෙන් ඉල්ලා සිටියහ. ඒ අනුව සාරිපුත්ත සග මොග්ගල්ලාන රහතුන් වහන්සේලාගේ ධාතූන් කිහිපයක් 1947දී ශ්රී ලංකාව වෙත ලබාදෙන ලද අතර, ඒවා මහජන ප්රදර්ශනයට විවෘත විය.[146] ශ්රී ලංකාව තුළ අති විශාල ජනකායකගේ වන්දනාවට එම ධාතූන් පාත්ර විය. කෙසේනමුත් පසුව ඒවා ඉන්දියාව වෙත රැගෙන ගිය අතර, 1952දී මෙම ධාතූන් තැන්පත් කිරීමට "චේතියගිරි විහාරය" නමින් නව විහාරයක් තනවන ලදී.[147] ජාතිකවාදී දෘෂ්ටිකෝණයෙන් බැලීමේ දී, මෙමඟින් ඉන්දියාව තුළ බෞද්ධ සම්ප්රදාය නිල වශයෙන් නැවත ස්ථාපිත කිරීම සනිටුහන් කරයි. ඇතැම් ධාතූන් බුරුමය විසින් ලබාගන්නා ලදී.[148]
අභිලේඛන
[සංස්කරණය].JPG)

සාංචියේ, විශේෂයෙන්ම ස්තූප අංක 1, හි බ්රාහ්මී අභිලේඛන විශාල සංඛ්යාවක් හමුවේ. ඉන් බොහෝමයක් ප්රදානයන් පිළිබඳ සඳහන් කුඩා සෙල්ලිපි වුවද, එහි විශාල ඓතිහාසික වැදගත්කමක් පවතියි. 1837දී ජේම්ස් ප්රින්සෙප් විසින් එහි බොහෝ අභිලේඛන බ්රාහ්මී අක්ෂර ද්විත්වයකින් අවසන් වන බව හඳුනා ගත්තේ ය. එම අක්ෂර ද්විත්වය "දානං" (දානය) යැයි ප්රින්සෙප් සලකා ඇත. මෙය බ්රාහ්මී අක්ෂර කියවා තේරුම් ගැනීමට මඟපෑදී ය.[151][152]
දානයන් පිළිබඳ වාර්තා විශ්ලේෂණය කිරීමේ දී[153] ඉන් බොහෝ දායකයන් ප්රදේශයේම වැසියන් (නගර පිළිබඳ සඳහන් නොමැති) බැව් පෙනේ. ඉන් සමහරෙක් උජ්ජයින්, වීදිශා, කුරාර, නදීනගර්, මහිසති, කුර්ඝාර, භෝගවදන් සහ කංදගීගාම් වැනි ප්රදේශවලින් වෙති. සාංචියෙන් යවන (ඉන්දු-ග්රීක)[80] දායකයන් පිළිබඳ අභිලේඛන තුනක් හමුවී ඇති අතර, ඉන් වඩාත්ම පැහැදිළි අභිලේඛනයෙහි "සෙටපථියස යෝනස දානං" ("සෙටපථ හි යෝනයන්ගේ දානය") ලෙස සඳහන් වේ. සෙටපථ නගරය මෙතෙක් හඳුනාගෙන නැත.[83]
මේවාත් බලන්න
[සංස්කරණය]ආශ්රේයයන්
[සංස්කරණය]- ^ Buddhist Art Frontline Magazine 13–26 May 1989
- ^ Buddhist Landscapes in Central India: Sanchi Hill and Archaeologies of Religious and Social Change, c. Third Century BC to Fifth Century AD, Julia Shaw, Routledge, 12 Aug 2016
- ^ Buddhist Circuit in Central India: Sanchi, Satdhara, Sonari, Andher, Travel ... p31
- ^ [1] Rs 50, Rs 200, Rs 500 and Rs 2000 notes images: Here are the new currency notes released by RBI
- ^ a b c d e Buddhist Circuit in Central India: Sanchi, Satdhara, Sonari, Andher, Travel Guide (ඉංග්රීසි බසින්). Goodearth Publications. 2010. p. 12. ISBN 9789380262055.
- ^ a b c d World Heritage Monuments and Related Edifices in India, Volume 1 p.50 by Alī Jāvīd, Tabassum Javeed, Algora Publishing, New York [2]
- ^ a b Marshall, "A Guide to Sanchi" p.31
- ^ බුත්කාරා ස්තූපය මෞර්ය යුගයේ ඉදිවූ එවැනි අර්ධ ගෝලාකාර ස්තූප ගොඩනැගිල්ලක්න්වන අතර, එය පිළිබඳ පුරාවිද්යා වාර්තා ගණනාවක් හමුවේ.
- ^ Marshall, "A Guide to Sanchi" p.8ff Public Domain text
- ^ Drawing reconstruction by F.C. Maisey for reference
- ^ a b Described in Marshall p.25-28 Ashoka pillar.
- ^ Buddhist Architecture by Huu Phuoc Le p.155
- ^ Buddhist Architecture by Huu Phuoc Le, 2010, p.155
- ^ John Marshall, "A Guide to Sanchi" p.93 Public Domain text
- ^ a b Marshall, "A Guide to Sanchi" p.90ff Public Domain text
- ^ Buddhist Architecture, Lee Huu Phuoc, Grafikol 2009, p.147
- ^ Singh, Upinder (2016). The Idea of Ancient India: Essays on Religion, Politics, and Archaeology (අරාබි බසින්). SAGE Publications India. ISBN 9789351506454.
- ^ Abram, David; (Firm), Rough Guides (2003). The Rough Guide to India (ඉංග්රීසි බසින්). Rough Guides. ISBN 9781843530893.
- ^ a b Marshall, John (1955). Guide to Sanchi.
- ^ Chakrabarty, Dilip K. (2009). India: An Archaeological History: Palaeolithic Beginnings to Early Historic Foundations (ඉංග්රීසි බසින්). Oxford University Press. ISBN 9780199088140.
- ^ "Who was responsible for the wanton destruction of the original brick stupa of Ashoka and when precisely the great work of reconstruction was carried out is not known, but it seems probable that the author of the former was Pushyamitra, the first of the Shunga kings (184-148 BC), who was notorious for his hostility to Buddhism, and that the restoration was affected by Agnimitra or his immediate successor." in John Marshall, A Guide to Sanchi, p. 38. Calcutta: Superintendent, Government Printing (1918).
- ^ Buddhist Landscapes in Central India: Sanchi Hill and Archaeologies of Religious and Social Change, c. Third Century BC to Fifth Century AD Julia Shaw, Routledge, 2016 p.58
- ^ a b c d Buddhist Landscapes in Central India: Sanchi Hill and Archaeologies of Religious and Social Change, C. Third Century BC to Fifth Century AD, Julia Shaw, Left Coast Press, 2013 p.88ff
- ^ a b c d e Buddhist Architecture Huu Phuoc Le, Grafikol, 2010 p.149
- ^ Marshall, John (1936). A guide to Sanchi. Patna: Eastern Book House. p. 36. ISBN 81-85204-32-2.
- ^ a b c d Ornament in Indian Architecture Margaret Prosser Allen, University of Delaware Press, 1991 p.18
- ^ a b c d e f An Encyclopaedia of Indian Archaeology, by Amalananda Ghosh, BRILL p.295
- ^ a b c d e f Buddhist Landscapes in Central India: Sanchi Hill and Archaeologies of Religious and Social Change, C. Third Century BC to Fifth Century AD, Julia Shaw, Left Coast Press, 2013 p.90
- ^ a b "The railing of Sanchi Stupa No.2, which represents the oldest extensive stupa decoration in existence, (and) dates from about the second century B.C.E." Constituting Communities: Theravada Buddhism and the Religious Cultures of South and Southeast Asia, John Clifford Holt, Jacob N. Kinnard, Jonathan S. Walters, SUNY Press, 2012 p.197
- ^ a b Didactic Narration: Jataka Iconography in Dunhuang with a Catalogue of Jataka Representations in China, Alexander Peter Bell, LIT Verlag Münster, 2000 p.15ff
- ^ Buddhist Architecture, Huu Phuoc Le, Grafikol, 2010 p.149
- ^ Ancient Indian History and Civilization, Sailendra Nath Sen, New Age International, 1999 p.170
- ^ An Indian Statuette From Pompeii, Mirella Levi D'Ancona, in Artibus Asiae, Vol. 13, No. 3 (1950) p.171
- ^ Marshall p.81
- ^ Marshall p.82
- ^ a b Marhall, "A Guide to Sanchi" p.95 Pillar 25. Public Domain text
- ^ a b Alcock, Susan E.; Alcock, John H. D'Arms Collegiate Professor of Classical Archaeology and Classics and Arthur F. Thurnau Professor Susan E.; D'Altroy, Terence N.; Morrison, Kathleen D.; Sinopoli, Carla M. (2001). Empires: Perspectives from Archaeology and History (ඉංග්රීසි බසින්). Cambridge University Press. p. 169. ISBN 9780521770200.
- ^ a b John Marshall, "A guide to Sanchi", p.48
- ^ a b Indian History (ඉංග්රීසි බසින්). Tata McGraw-Hill Education. p. 251. ISBN 9781259063237.
- ^ Jain, Kailash Chand (1972). Malwa Through The Ages (ඉංග්රීසි බසින්). Motilal Banarsidass Publ. p. 154. ISBN 9788120808249.
- ^ a b World Heritage Monuments and Related Edifices in India, Volume 1 by Alī Jāvīd, Tabassum Javeed, Algora Publishing, 2008 p.51
- ^ In the Realm of Gods and Kings by Andrew Topsfield, Philip Wilson Publishers, 2014 p.250
- ^ Chakrabarti, Manika (1981). Mālwa in Post-Maurya Period: A Critical Study with Special Emphasis on Numismatic Evidences (ඉංග්රීසි බසින්). Punthi Pustak. p. 100.
- ^ a b Indian and Foreign Review – Volume 23 – Page 58, 1985
- ^ Vogel, Jean Ph (1947). India antiqua (ඉංග්රීසි බසින්). Brill Archive. p. 130.
- ^ a b The East: Buddhists, Hindus and the Sons of Heaven, Architecture in context II, Routledge, 2015, by Christopher Tadgell p.24
- ^ A Companion to Asian Art and Architecture by Deborah S. Hutton, John Wiley & Sons, 2015, p.438 [3]
- ^ "Buddhist Architecture" by Huu Phuoc Le Grafikol, 2010, p.44
- ^ the "pilaster capitals with Greek florals and a form which is of Greek origin (though generally described as Persian) go back to Late Archaic."in "The Diffusion of Classical Art in Antiquity" John Boardman, Princeton University Press, 1993, p.110
- ^ "The Archaeology of South Asia: From the Indus to Asoka, c.6500 BCE-200 CE" Robin Coningham, Ruth Young Cambridge University Press, 31 aout 2015, p.414 [4]
- ^ a b Archaeological Survey Of India Annual Report 1906-7. 1909. p. 72.
- ^ a b c Mani, B. R. (2012). Sarnath : Archaeology, Art and Architecture. Archaeological Survey of India. p. 60.
- ^ Majumdar, B. (1937). Guide to Sarnath. p. 41.
- ^ Presented as a "Mauryan capital, 250 BC" with the addition of recumbant lions at the base, in the page "Types of early capitals" in Brown, Percy (1959). Indian Architecture (Budhist And Hindu). p. x.
- ^ Early Buddhist Narrative Art by Patricia Eichenbaum Karetzky p.16
- ^ Early Byzantine Churches in Macedonia & Southern Serbia by R.F. Hoddinott p.17
- ^ India Archaeological Report, Cunningham, p185-196
- ^ Age of the Nandas and Mauryas by Kallidaikurichi Aiyah Nilakanta Sastri p.376 sq
- ^ A Comprehensive History Of Ancient India (3 Vol. Set), Sterling Publishers Pvt. Ltd, 2003 p.87
- ^ Marshall p.65
- ^ Marshall p.71
- ^ Marshall p.55
- ^ [A Guide To Sanchi, Marshall, John, 1918 https://archive.org/details/in.ernet.dli.2015.35740 p.37]
- ^ a b Lopez Jr., Donald S. "The Buddha's relics". Encyclopædia Britannica. http://www.britannica.com/EBchecked/topic/83105/Buddha/230773/The-Buddhas-relics.
- ^ a b Strong 2007, පිටු අංක: 136–37.
- ^ Marshall p.68-69
- ^ a b Asiatic Mythology by J. Hackin p.83ff
- ^ Asoka and the Buddha-Relics, T.W. Rhys Davids, Journal of the Royal Asiatic Society, 1901, pp. 397-410 [5]
- ^ Asiatic Mythology by J. Hackin p.84
- ^ a b Singh, Upinder (2017). Political Violence in Ancient India (ඉංග්රීසි බසින්). Harvard University Press. p. 162. ISBN 9780674975279.
- ^ Singh, Upinder (2008). A History of Ancient and Early Medieval India: From the Stone Age to the 12th Century (ඉංග්රීසි බසින්). Pearson Education India. p. 333. ISBN 9788131711200.
- ^ Thapar, Romila (2012). Aśoka and the Decline of the Mauryas (ඉංග්රීසි බසින්). Oxford University Press. p. 27. ISBN 9780199088683.
- ^ a b Ashoka in Ancient India Nayanjot Lahiri, Harvard University Press, 2015 p.296
- ^ a b c d "Musicians generally described as "Greeks" from the eastern gateway at Sanchi" in Stoneman, Richard (2019). The Greek Experience of India: From Alexander to the Indo-Greeks (ඉංග්රීසි බසින්). Princeton University Press. pp. 441–444, Fig. 15.6. ISBN 9780691185385.
- ^ "Sculptures showing Greeks or the Greek type of human figures are not lacking in ancient India. Apart from the proverbial Gandhara, Sanchi and Mathura have also yielded many sculptures that betray a close observation of the Greeks." in Graeco-Indica, India's cultural contacts, by Udai Prakash Arora, published by Ramanand Vidya Bhawan, 1991, page 12
- ^ These "Greek-looking foreigners" are also described in Susan Huntington, "The art of ancient India", p. 100
- ^ Sanchi notice "Foreigners worshiping Stupa"
- ^ a b "The Greeks evidently introduced the himation and the chiton seen in the terracottas from Taxila and the short kilt worn by the soldier on the Sanchi relief." in Foreign influence on Indian culture: from c. 600 B.C. to 320 A.D., Manjari Ukil Originals, 2006, p.162
- ^ a b "The scene shows musicians playing a variety of instruments, some of them quite extraordinary such as the Greek double flute and wind instruments with dragon head from West Asia" in The Archaeology of Seafaring in Ancient South Asia, Himanshu Prabha Ray, Cambridge University Press, 2003 p.255
- ^ a b Purātattva, Number 8. Indian Archaeological Society. 1975. p. 188.
A reference to a Yona in the Sanchi inscriptions is also of immense value.(...) One of the inscriptions announces the gift of a Setapathia Yona, "Setapathiyasa Yonasa danam" i.e the gift of a Yona, inhabitant of Setapatha. The word Yona can't be here anything, but a Greek donor
- ^ Epigraphia Indica Vol.2 p.395 inscription 364
- ^ John Mashall, The Monuments of Sanchi p.348 inscription No.475
- ^ a b c d e The Idea of Ancient India: Essays on Religion, Politics, and Archaeology, Sage Publications India, Upinder Singh, 2016 p.18
- ^ John Mashall, The Monuments of Sanchi p.308 inscription No.89
- ^ John Mashall, The Monuments of Sanchi p.345 inscription No.433
- ^ a b Faces of Power: Alexander's Image and Hellenistic Politics by Andrew Stewart p.180
- ^ a b "The Diffusion of Classical Art in Antiquity", John Boardman, 1993, p.112
- ^ "The Diffusion of Classical Art in Antiquity, John Boardman, 1993, p.112 Note 91
- ^ a b Marshall p.58 Third Panel
- ^ a b Marshall p.64
- ^ A Guide to Sanchi, Marshall p.65
- ^ A Guide to Sanchi, John Marshall
- ^ Rhi, Ju-Hyung (1994). "From Bodhisattva to Buddha: The Beginning of Iconic Representation in Buddhist Art". Artibus Asiae. 54 (3/4): 220–221. doi:10.2307/3250056. JSTOR 3250056.
- ^ A Guide To Sanchi, Marshall, John, 1918 p.37
- ^ a b c d e f g h i j k John Marshall, A Guide to Sanchi, 1918 p.46ff (Public Domain text)
- ^ a b c d John Marshall, A Guide to Sanchi, 1918 p.37ff (Public Domain text)
- ^ Shrestha, SS (1999). "Ramagrama excavation" (PDF). Ancient Nepal: Journal of the Department of Archaeology. 142: 1–12. සම්ප්රවේශය 2014-11-30.
- ^ a b c d e f g h A Guide to Sanchi, John Marshall p.50ff Public Domain text
- ^ Interpretation in "Ashoka in Ancient India", by Nayanjot Lahiri, Harvard University Press, 2015 p.296
- ^ Epigraphia Indice Vol.2 p.378 Inscription No.200
- ^ Marshall p.55ff Public Domain text
- ^ a b c d e f g h i j John Marshall, A Guide to Sanchi, 1918 p.58ff (Public Domain text)
- ^ a b c John Marshall, A Guide to Sanchi, 1918 p.57ff (Public Domain text)
- ^ Susan Huntington, "The art of ancient India", p. 100
- ^ a b c Marshall p.56
- ^ The Buddha Image: Its Origin and Development, Yuvraj Krishan, Bharatiya Vidya Bhavan, 1996 p.4
- ^ a b c d e f g h i Marshall p.60ff Public Domain text
- ^ A Guide to Sanchi, Marshall p.62ff Public Domain text
- ^ a b c d e f g h i j Marshall "A Guide to Sanchi" p.68ff Public Domain text
- ^ Marshall
- ^ a b Marshall p.73
- ^ a b Maisey, Sanchi and its remains", Plaque XXI
- ^ a b Marshall, " A Guide to Sanchi" p.83 Public Domain text
- ^ Buddhist Art in India, Ceylon, and Java, Jean Philippe Vogel, Adriaan Jacob Barnouw, Asian Educational Services, 1936 p.41
- ^ The Goose in Indian Literature and Art, Brill Archive p.58
- ^ a b c d e Buddhist Landscapes in Central India: Sanchi Hill and Archaeologies of Religious and Social Change, c. Third Century BC to Fifth Century AD, Julia Shaw, Routledge, 2016 p58-59
- ^ Indian Numismatic Studies by K. D. Bajpai p.100
- ^ Mitra, Debala (2001). Sanchi. Archeological Survey of India. p. 7 Note 1.
- ^ Kuraishi, Mohammad Hamid; Kak, Ram Chandra; Chanda, Ramaprasad; Marshall, John Hubert (1922). Catalogue of the Museum of Archaeology at Sanchi, Bhopal State. Calcutta, Superintendent Government Printing, India. pp. 29–32.
- ^ Marshall, The Monuments of India p.388
- ^ a b 2500 Years of Buddhism by P.V. Bapat, p.283
- ^ Marshall, The Monuments of India p.388 inscription 833
- ^ Rowland, 219-220; Harle, 111; Michell (1988), 94
- ^ Rowland, 219-220
- ^ Rowland, 219; Michell (1990), 185
- ^ a b c Marshall "A Guide to Sanchi" p.96 Pillar 26. Public Domain text
- ^ Sachim Kumar Tiwary in Monolithic Pillars of The Gupta Period B.R. Publishing Corporation 2014 p.92, page scan
- ^ Sanchi Archaeological Museum website notice [6]
- ^ a b c Marshall "A Guide to Sanchi" p.97 Pillar 35. Public Domain text
- ^ Great Monuments of India, DK p.41
- ^ Malwa Through The Ages, by Kailash Chand Jain p.277
- ^ "Buddhist Landscapes in Central India: Sanchi Hill and Archaeologies of Religious and Social Change, c. Third Century BC to Fifth Century AD", Julia Shaw, Routledge, 2016 p.20
- ^ Marshall p.52 Pillar 34
- ^ Reconstructing a Latina Temple Spire: Temple 45, Sanchi, Dissertation submitted to Cardiff University, Fiona Buckee, 2010
- ^ Ornament in Indian Architecture, Margaret Prosser Allen, University of Delaware Press, 1991 p.18
- ^ a b Didactic Narration: Jataka Iconography in Dunhuang with a Catalogue of Jataka Representations in China, Alexander Peter Bell, LIT Verlag Münster, 2000 p.31ff
- ^ Asoka, Mookerji Radhakumud, Motilal Banarsidass Publishe, 1962 p.204
- ^ The Buddha Image: Its Origin and Development, Yuvraj Krishan, Bharatiya Vidya Bhavan, 1996 p.26
- ^ The Buddha Image: Its Origin and Development, Yuvraj Krishan, Bharatiya Vidya Bhavan, 1996 p.1ff
- ^ The Grandeur of Gandhara: The Ancient Buddhist Civilization of the Swat, Peshawar, Kabul and Indus Valleys Rafi-us Samad, Algora Publishing, 2011 p.23
- ^ a b Journal of the Royal Asiatic Society of Great Britain and Ireland (ඉංග්රීසි බසින්). Cambridge University Press for the Royal Asiatic Society. 1851. pp. 108–109.
- ^ Wright, Colin. "'Miscellaneous Series. Plate.12. Juma Masjid, Chanderi'. Maisey in a top-hat sketching in the foreground". www.bl.uk. 2021-06-16 දින මුල් පිටපත වෙතින් සංරක්ෂණය කරන ලදී. සම්ප්රවේශය 2020-12-24.
- ^ John Marshall, "An Historical and Artistic Description of Sanchi", from A Guide to Sanchi, Calcutta: Superintendent, Government Printing (1918). Pp. 7-29 on line, Project South Asia. සංරක්ෂණය කළ පිටපත 10 පෙබරවාරි 2009 at the Wayback Machine
- ^ Percy Brown, Indian Architecture, 1955
- ^ Brekke, Torkel, Bones of Contention: Buddhist Relics, Nationalism and the Politics of Archaeology, Numen, Volume 54, Number 3, 2007, pp. 270-303(34)
- ^ "Ceylon Allowed To Keep Sanchi Relics Till May 8", Indian Express – 28 Apr 1947.
- ^ BUDDHA DISCIPLES WILL BE REBURIED; Relics of Followers of Ancient Leader to Be Reinterred at Rites in India Saturday, THE NEW YORK TIMES, 25 November 1952
- ^ Sariputta and Moggallana in the Golden Land: The Relics of the Buddha's Chief Disciples at the Kaba Aye Pagoda, Jack Daulton, Journal of Burma Studies, Volume 4, 1999 pp. 101-128
- ^ British Museum collection
- ^ Salomon, Richard (1998). Indian Epigraphy: A Guide to the Study of Inscriptions in Sanskrit, Prakrit, and the other Indo-Aryan Languages (ඉංග්රීසි බසින්). Oxford University Press. p. 207. ISBN 9780195356663.
- ^ Indian Epigraphy : A Guide to the Study of Inscriptions in Sanskrit, Prakrit, and the other Indo-Aryan Languages, Richard Salomon, Oxford University Press, 1998
- ^ Ashoka: The Search for India's Lost Emperor, Charles Allen, Little, Brown Book Group Limited, 2012
- ^ A study of inscribed reliefs within the context of donative inscriptions at Sanchi, Author: Milligan, Matthew David, Thesis, p.77
ග්රන්ථාවලිය
[සංස්කරණය]- Dehejia, Vidya. (1992). Collective and Popular Bases of Early Buddhist Patronage: Sacred Monuments, 100 BC-AD 250. In B. Stoler Miller (ed.) The Powers of Art. Oxford University Press: Oxford. ISBN 0-19-562842-X.
- Dehejia, Vidya. (1997). Indian Art. Phaidon: London. ISBN 0-7148-3496-3
- Harle, J.C., The Art and Architecture of the Indian Subcontinent, 2nd edn. 1994, Yale University Press Pelican History of Art, ISBN 0300062176
- Marshall, Sir John, A Guide to Sanchi, 1918, Indian Government, Calcutta
- Michell, George (1988), The Hindu Temple: An Introduction to its Meaning and Forms, 1977, University of Chicago Press, ISBN 978-0-226-53230-1
- Michell, George (1990), The Penguin Guide to the Monuments of India, Volume 1: Buddhist, Jain, Hindu, 1990, Penguin Books, ISBN 0140081445
- Mitra, Debala. (1971). Buddhist Monuments. Sahitya Samsad: Calcutta. ISBN 0-89684-490-0
- Rowland, Benjamin, The Art and Architecture of India: Buddhist, Hindu, Jain, 1967 (3rd edn.), Pelican History of Art, Penguin, ISBN 0140561021
- Life in Sanchi sculpture by A. L Srivastava( Book )
බාහිර සබැඳි
[සංස්කරණය] Buddhist monuments at Sanchi හා සබැඳි මාධ්ය විකිමාධ්ය කොමන්ස් හි ඇත
- Source Documents and Texts in South Asian Studies සංරක්ෂණය කළ පිටපත 2006-11-21 at the Wayback Machine
- Sanchi.org
- Sanchi Stupa — The World Heritage Site
- "Sanchi (Madhya Pradesh)", Jacques-Edouard Berger Foundation, World Art Treasures සංරක්ෂණය කළ පිටපත 2007-09-27 at the Wayback Machine
- Google Street View tour of Sanchi


.JPG)
යාබද බෞද්ධ ඉදිකිරීම් | |
|---|---|
- Villages in Raisen district
- Tourist attractions in Raisen district
- World Heritage Sites in India
- මෞර්ය අධිරාජ්යය
- ඉන්දියානු ගෘහ නිර්මාණාත්මක ඉතිහාසය
- බෞද්ධ කලාව
- ඉන්දියාවේ ස්තූප
- Buddha statues in India
- Buddhist sites in Madhya Pradesh
- World Heritage Sites in Madhya Pradesh
- මෞර්ය කලාව
- ඉන්දියාවේ බෞද්ධ වන්දනා ස්ථාන
- බෞද්ධ ධාතූන්
- ඉන්දියාවේ බුද්ධාගම
- දාගැබ්